
If you survived your first day in Minecraft, congratulations—you already passed the most chaotic part of early survival. Day 1 is all about not dying. Day 2 is where your world starts becoming stable.
This is the day when most players stop feeling lost and start building momentum.
On Day 2, your priorities change. You are no longer just reacting to danger. Now you should begin setting up the systems that will carry you through the next several days. That means upgrading your gear, improving your shelter, finding reliable resources, and preparing for longer-term survival.
The three biggest Day 2 goals are simple:
- Find iron
- Explore smartly, especially for a village
- Turn your temporary shelter into a real starter base
A lot of beginners waste Day 2 by doing random tasks. They chop extra wood, run far away from home, get lost, or spend too much time decorating a tiny hut with no iron, no storage, and no plan. That feels productive, but it usually slows down real progress.
A smart Day 2 gives you something much better:
- iron tools
- better food security
- a safer home
- more organized storage
- a stronger position for mining and future exploration
This guide will show you exactly how to handle Day 2 in the smartest beginner-friendly way possible. Even if you are brand new to Minecraft, you will know what to prioritize, what to avoid, and how to end the day much stronger than you started.

What Day 2 Is Really About
Day 2 in Minecraft is the bridge between “barely surviving” and “actually progressing.”
On Day 1, your goal was emergency survival. On Day 2, your goal is controlled progression.
That means:
- Upgrading weak tools
- Getting materials you will use constantly
- Making your base actually useful
- Expanding carefully, not randomly
- Exploring without getting lost
- Preparing for future mining and farming
If Day 1 was about panic prevention, Day 2 is about efficiency.
You should not feel pressure to do everything in one day. You do not need a giant house, a farm, a mine, a village, and full iron armor all at once. Instead, you want to make smart choices in the correct order.
The best Day 2 mindset is this:
Secure your area, improve your gear, and build a base that helps future progress.
That is how you create a survival world that lasts.
Your Top Priority on Day 2: Iron
If Day 1 runs on wood and stone, Day 2 runs on iron.
Iron is one of the most important materials in early Minecraft because it unlocks a huge upgrade in survival power. Once you have iron, your options open up fast.
Why iron matters so much
Iron lets you craft:
- Iron pickaxe
- Iron sword
- Iron armor
- Shield materials indirectly
- Bucket
- Shears
- Flint and steel later
- Better tools for faster progress
Even a small amount of iron can change your survival experience dramatically.
For example:
- An iron pickaxe allows you to mine more valuable resources later
- An iron sword helps with mobs
- Iron armor reduces deaths
- A bucket gives you incredible utility
- A shield can save you from skeletons and creepers
For a beginner, iron is the first material that makes the game feel less fragile.

How Much Iron Should You Aim for on Day 2?
Beginners often ask, “How much iron is enough?”
The answer depends on what you want to craft first, but a strong Day 2 target is around 20 to 30 raw iron if possible.
That amount can cover things like:
- iron pickaxe
- iron sword
- shield support
- bucket
- maybe some armor pieces
- future reserve
If you find less than that, do not worry. Even 10 to 15 iron is still a very useful start.
The important thing is not to leave Day 2 with zero iron if you had the chance to get some.
Best Ways to Find Iron Early
There are several beginner-friendly ways to find iron on Day 2, and some are much safer than others.
1. Surface-exposed stone areas
This is one of the easiest methods for beginners. Check:
- hillsides
- mountain edges
- cliff walls
- cave entrances
- exposed stone near rivers and lakes
Sometimes iron ore is visible without needing deep mining. This is ideal because it reduces risk.
2. Shallow caves
A small, open cave can be perfect for early iron gathering. You do not need to dive deep into dangerous tunnels. Often, enough iron appears near the entrance or first chamber.
3. Small mining branch near base
If you cannot find exposed iron nearby, you can make a simple mine near your base. This is often safer than wandering too far from home.
4. Mountains and stony biomes
Large stone-heavy areas often give you better visibility and more exposed ore. Be careful with steep drops, but these places can be excellent for early resource gathering.
The Safest Day 2 Iron Strategy for Beginners
Here is the smartest method if you are still learning the game.
Step 1: Start from your base
Leave home in the morning with:
- stone or iron tools if you have them
- food
- torches
- blocks
- crafting table if needed
- at least one open inventory row
Step 2: Search in a circle, not a straight line
Instead of running in one random direction forever, explore in a loose circle around your base. This helps you:
- avoid getting lost
- return home faster
- learn your local area
- notice caves and landmarks
Step 3: Check all visible stone
Any exposed stone is a chance for coal, iron, or useful cave entrances.
Step 4: Take easy iron first
If iron is visible and safe, mine it immediately. Do not ignore obvious iron because you hope to find a “better” cave later.
Step 5: Leave dangerous caves early
If the cave becomes dark, deep, or confusing, back out. Day 2 survival is about smart loot, not heroic risk.
That approach keeps progress steady while minimizing death chances.

Smelting Iron the Right Way
Once you get raw iron, you need to smelt it in a furnace.
Best fuel options on Day 2
- Coal
- Charcoal
- Wooden planks if necessary
- Extra logs only as backup
Coal is best because it is efficient and usually easy to find in early caves or exposed stone walls. If you do not have coal, charcoal is perfectly fine.
Should you smelt immediately or save it?
Usually, smelt iron as soon as you return safely to base. That gives you access to upgrades before you risk another trip outside.
Beginners often carry raw iron around while continuing exploration. That is risky. If you die, you may lose valuable early progress. It is smarter to bring iron home, smelt it, and convert it into useful upgrades.
What Should You Craft First With Iron?
This is where many beginners make inefficient choices. Not every iron item has the same value on Day 2.
Best first iron crafts
In most cases, your early iron priority should look like this:
- Iron Pickaxe
- Shield
- Bucket
- Iron Sword
- Armor pieces
Let’s break that down.
Why the Iron Pickaxe Comes First
The iron pickaxe is often your best first investment because it unlocks important future progression. Without it, your mining ability stays limited.
An iron pickaxe helps you:
- mine faster than stone
- prepare for gold, redstone, and diamonds later
- gather tough resources more efficiently
- improve general mining safety by speeding up the process
Even if you want armor badly, the iron pickaxe often gives better long-term value first.

Why a Shield Is More Important Than Most Beginners Realize
A shield is one of the most powerful survival tools in Minecraft, especially for new players.
To craft a shield, you need:
- 1 iron ingot
- 6 wooden planks
That is an amazing deal for the protection it provides.
Why shields are incredible
A shield helps protect you from:
- skeleton arrows
- many melee attacks
- creeper damage if timed well
- panic situations in caves
For beginners, shields reduce deaths more than an early helmet or boots in many situations.
If you have enough iron for only a few upgrades, getting a shield is almost always worth it.
The Bucket: Small Item, Huge Value
Many beginners underestimate the bucket because it does not look like armor or a weapon. In reality, the bucket is one of the most useful survival tools in the game.
With a bucket, you can:
- carry water
- stop fall damage later with practice
- create safer cave descents
- protect yourself from fire
- start farming
- move animals and villagers in future projects
- manage lava and terrain better
On Day 2, a water bucket adds flexibility and safety to almost everything you do.
If you are choosing between a weak armor upgrade and a bucket, the bucket is often the smarter long-term choice.
Should You Make Full Iron Armor on Day 2?
Only if you can do it comfortably.
Full iron armor is great, but beginners sometimes use all their early iron on armor and then have no iron left for tools, shield, or bucket. That slows overall progress.
Better Day 2 armor plan
A smarter approach is usually:
- iron pickaxe first
- shield
- bucket
- then armor pieces
If you have extra iron after that, prioritize armor pieces in this order:
- Chestplate
- Leggings
- Helmet
- Boots
The chestplate usually gives the biggest value first.
Day 2 Exploration: How to Search Without Getting Lost
Exploration becomes much more important on Day 2, but it also becomes more dangerous. You now have resources worth protecting, and getting lost can turn a good start into a frustrating mess.
The beginner rule: explore close before exploring far
Before traveling long distances, learn your local area first.
Look for:
- nearby caves
- rivers
- open plains
- animal groups
- sugar cane
- village structures
- mountains or cliffs
- forests for wood
This gives you a better understanding of your spawn region and helps you make smarter base decisions later.
Easy ways to avoid getting lost
Use these habits:
- stay within visible range of major landmarks
- remember the shape of hills and water
- build simple markers if needed
- do not cross several forests and rivers without tracking your path
- return home before sunset unless fully prepared
One of the worst Day 2 mistakes is saying, “I’ll just go a little farther,” and then realizing you have no idea where your base is.
Why Finding a Village on Day 2 Is a Big Win
A village is one of the most valuable structures for early-game players. If you find one on Day 2, you can gain a huge advantage.
What a village gives you
- beds
- food
- useful workstations
- villagers for later trading
- shelter
- early loot
- easy expansion opportunities
Villages are especially powerful because they help with both short-term survival and long-term progression.
Signs you should actively look for a village
If your base area is weak in food, flat space, or useful structures, a village can solve several problems at once.
Villages are often easier to spot in:
- plains
- savannas
- deserts
- snowy areas
If you are in dense forest, they can be harder to notice, so look from high ground when possible.

What to Do If You Find a Village
Do not rush mindlessly through it. A smart village visit can set you up for multiple future days.
Step 1: Secure a bed if needed
If you still do not have a bed, this is an easy solution.
Step 2: Check crops and hay bales
Villages often provide food that can stabilize your hunger situation quickly.
Step 3: Look at villager workstations
Workstations matter later for trading and job assignments. Start noticing them now.
Step 4: Decide whether the village is worth building near
Ask:
- Is it close enough to my current base?
- Does the area around it have wood, animals, and stone?
- Is the terrain good for expansion?
- Would moving here make future progress easier?
Step 5: Do not destroy the village carelessly
It is tempting to rip apart everything for resources, but remember that villages become far more valuable later when you start villager trading.
Treat villages as future investments, not just free blocks.
Should You Move Your Base to a Village?
Sometimes yes, sometimes no.
Good reasons to move near a village
- your current base is tiny or badly placed
- the village is in a much better biome
- food and flat land are better there
- you want future villager access
- your original shelter was only temporary
Reasons to stay where you are
- your current area already has good caves and resources
- the village is too far away
- moving would waste too much time
- you already built a solid base foundation
For most beginners, the best answer is often:
keep your main base where it is, or build a new base near the village only if the location is clearly better.
Do not move just because a village exists. Move because it improves your survival world.
Building Your First Real Base on Day 2
This is the part where your survival world starts feeling personal.
Day 1 shelter is temporary. Day 2 base is functional.
Your first real base should not be giant or complex. It should be:
- safe
- organized
- expandable
- near useful resources
- easy to defend
- convenient for storage and crafting
Think of it as your “starter headquarters.”

Best Location for a Real Starter Base
A great Day 2 base location usually has:
- trees nearby
- stone nearby
- some open space
- animals or farming potential
- water access
- decent terrain for expansion
- not too far from caves
- preferably not in a cramped or dangerous spot
Good biome choices for beginners
- Plains
- Forest edge
- Taiga edge
- Savanna edge
- Meadow near lower slopes
These areas tend to be easier to build in and easier to navigate.
Locations to avoid for a beginner base
- deep jungle interiors
- cliff edges with constant fall danger
- dark swamp zones early on
- tiny islands with low resources
- cave entrances as your only main room
A base should make survival easier, not harder.
What Your Day 2 Base Must Include
A real base does not need to be fancy, but it should include basic systems that reduce friction in your gameplay.
At minimum, try to include:
- Bed
- Crafting table
- At least 1 furnace
- Chest storage
- Safe entrance
- Lighting
- Space for future expansion
A strong Day 2 upgrade is adding:
- double chest storage
- second furnace
- dedicated smelting area
- small food corner
- early mine entrance nearby
Base layout tip for beginners
Keep everything close and simple. A compact base saves time and lowers confusion.
For example:
- one corner for storage
- one corner for crafting and furnaces
- one wall for bed and personal gear
- one area reserved for future expansion
Function first, decoration later.
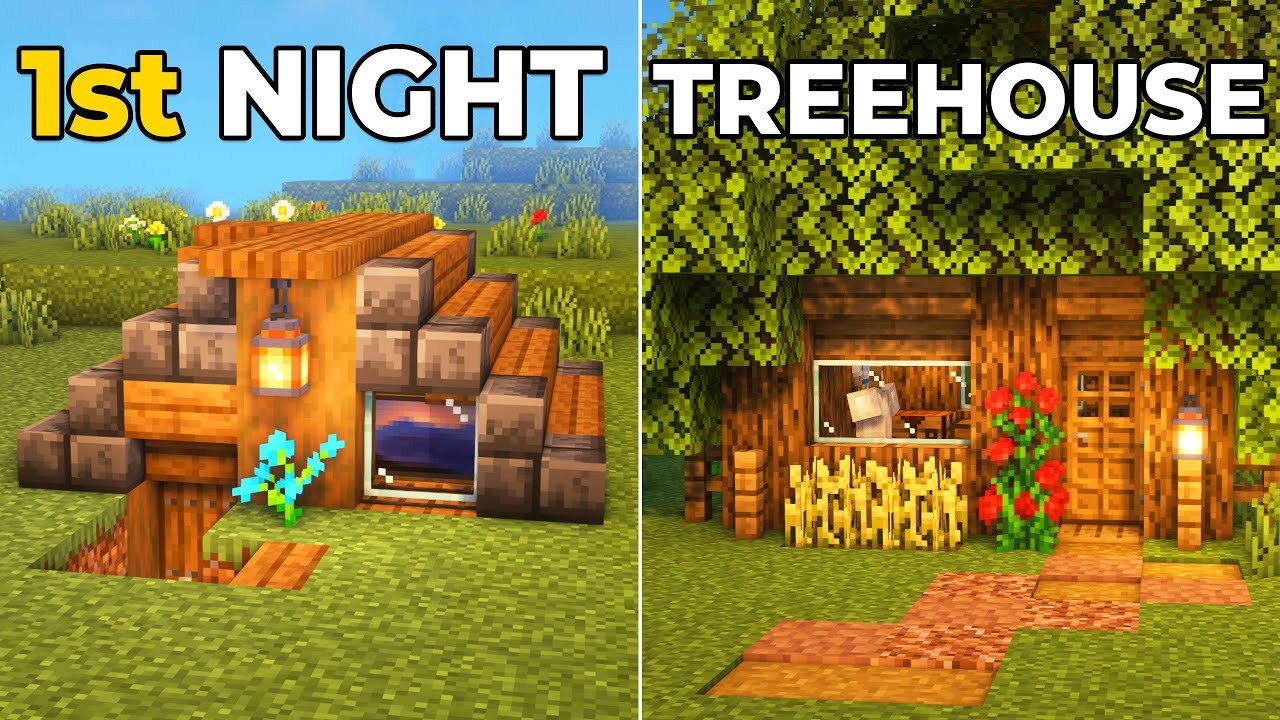
A Simple Base Design That Works for Almost Everyone
If you are unsure what to build, use this easy formula:
Starter base blueprint
- 7×7 or 9×9 interior
- rectangular or square shape
- roof fully closed
- one front door
- torches inside and outside
- chest wall
- furnace section
- bed area
This gives enough room to breathe without wasting too many materials.
Should you build underground or above ground?
Both are fine, but for beginners:
Above-ground base
Pros:
- easier visibility
- easier expansion
- feels more like a home
- easier to navigate
Cons:
- takes more materials
- more exposed during building
Dug-into-hill base
Pros:
- fast
- safe
- efficient
- low material cost
Cons:
- can feel cramped
- less natural light
If you want a smooth Day 2, a hill base upgraded into a real starter room is often the easiest solution.
Storage and Organization Matter More Than You Think
New players often ignore storage until their inventory becomes a disaster. That creates constant annoyance and wasted time.
Day 2 is the perfect time to set up order.
Basic chest organization idea
You do not need labeled signs yet, but try grouping items roughly like this:
- blocks and building materials
- tools and weapons
- food and farming items
- ores and minerals
- mob drops and rare items
Even simple organization helps you:
- craft faster
- avoid losing useful resources
- know what you need next
- reduce panic during dangerous moments
A messy base makes the game feel harder than it actually is.
Why Day 2 Is a Great Time to Start a Mini Mine
Once your base is more stable, creating a nearby mine entrance is smart.
This does not need to be a full optimized strip mine yet. It can just be a safe, simple tunnel that gives you access to:
- more stone
- coal
- iron
- underground expansion later
Safe early mine rules
- never dig straight down
- bring torches
- bring food
- stop if the tunnel opens into dangerous darkness
- mark your path clearly
- return to base before overcommitting
A short, safe mine connected to your base is one of the best Day 2 investments.

Extra Resources Worth Collecting on Day 2
Iron is the star, but Day 2 is also a great time to collect other useful materials while exploring.
Coal
Needed for torches and smelting. Always useful.
Wood
Still essential. Never assume you have enough forever.
Seeds
Good for future farming.
Sugar cane
Very important later for books and paper. If you see it near water, grab it.
Leather
Useful later for books. Cows are especially valuable because they give both food and leather.
Sand
Not urgent, but helpful later for glass.
Gravel
Can help with flint later and is useful in some builds.
You do not need huge amounts yet, but collecting convenient materials early saves time later.

Common Day 2 Mistakes Beginners Make
Avoiding these mistakes will improve your world fast.
1. Using all iron on random armor pieces
Tools, shield, and bucket often matter more first.
2. Exploring too far from base
New players frequently lose track of home and waste half the day returning—or never return at all.
3. Keeping a temporary base too messy
If your shelter stays disorganized, every future day becomes slower.
4. Spending all day decorating
A beautiful base with no iron, no mine, and no structure is not efficient progress.
5. Ignoring villages
Even if you do not move there, villages are too valuable to ignore.
6. Going deep into caves without preparation
Day 2 is still early-game. Take easy resources first.
7. Forgetting food while focusing on iron
Iron is important, but low hunger still kills progress.
8. Smelting too late
Use your iron when you can benefit from it, not after another risky trip.
A Smart Day 2 Schedule for Beginners
If you want a practical model, follow this structure.
Morning: base check and gear prep
- eat if needed
- organize inventory
- bring tools, food, blocks, torches
- note your base position carefully
Midday: iron search and local exploration
- search nearby caves and exposed stone
- mine coal and iron
- scan for village, animals, rivers, sugar cane
Afternoon: return and smelt
- come home before night pressure starts
- smelt iron
- craft priority upgrades
- organize loot
Late afternoon: base improvement
- expand shelter into a real base
- place chests
- add furnaces
- improve lighting
- build more secure walls or roof if needed
Evening: safe productivity
- cook food
- sort materials
- make plans for Day 3
- sleep if possible
This flow gives you both progression and stability.
What a Successful Day 2 Looks Like
By the end of Day 2, a strong beginner setup usually includes:
- some iron collected and smelted
- an iron pickaxe
- a shield or bucket, ideally both
- improved food supply
- a real base instead of a panic shelter
- chest storage
- furnace setup
- a better understanding of nearby terrain
- maybe a village discovered
- enough confidence to start mining seriously on Day 3
That is a very strong position.
You do not need full iron armor or a giant house yet. You just need useful upgrades and a base that supports future progress.

Beginner FAQ
How do I find iron fast in Minecraft?
The easiest beginner-friendly method is checking exposed stone on hills, mountains, and shallow caves. Iron is often visible without deep mining.
What should I craft first with iron?
Usually an iron pickaxe first, then a shield, then a bucket, then other upgrades depending on how much iron you have.
Is a village better than making my own base?
A village is very helpful, but not always better. It depends on distance, biome quality, and whether moving there actually improves your survival setup.
Should I explore or build on Day 2?
You should do both, but in the right order. Explore enough to get iron and useful landmarks, then return to improve your base before night.
Do I need full iron armor on Day 2?
No. It is great if you can get it, but smart tool and utility upgrades are often more valuable first.
What if I still only have a tiny dirt shelter?
That is okay. Day 2 is the perfect time to turn that tiny shelter into a real starter base.
Day 2 Is Where Your World Starts Becoming Stable
The first day in Minecraft is about staying alive. The second day is where your world begins to make sense.
This is the day when you stop reacting to every danger and start building systems that help you long term. Iron gives you better survival power. Villages open future opportunities. A real base turns chaos into structure.
If you use Day 2 wisely, the rest of your early survival journey becomes much smoother.
So remember the core plan:
- get iron
- explore smart
- improve your home
- avoid getting lost
- build for future progress, not just the current moment
That is how you go from “new player trying not to die” to “survival player with momentum.”