[ad_1]
The scrap wood pile in our garage had grown into a full-blown problem, so making dedicated scrap wood storage was a top priority in the new shed. We also wanted to use as much of our leftover lumber as possible to build the organizer, minimizing new purchases. Below I share the straightforward steps we followed to create an efficient, space-saving storage system for a variety of leftover boards, moldings, and plywood panels.
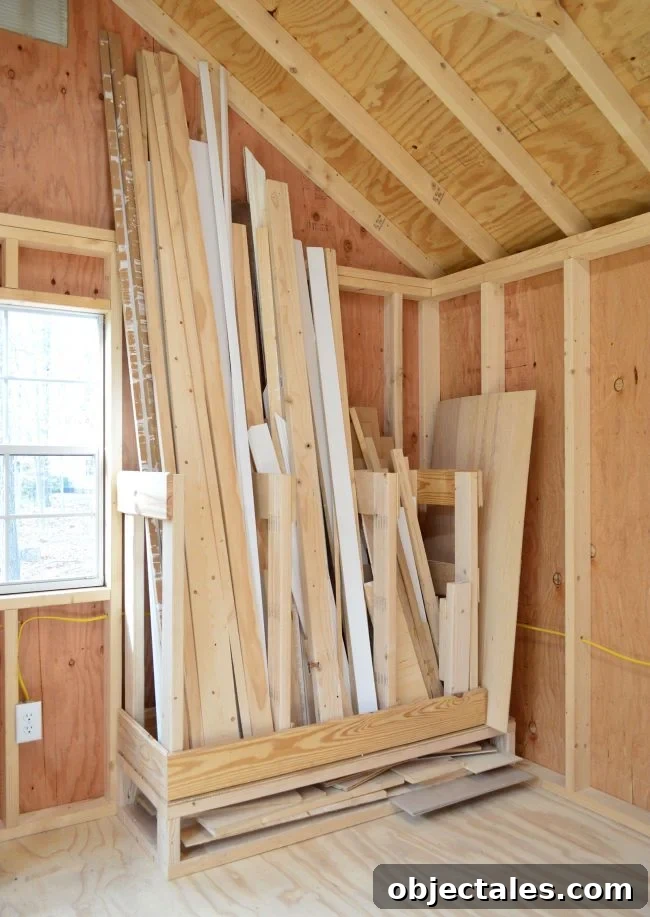
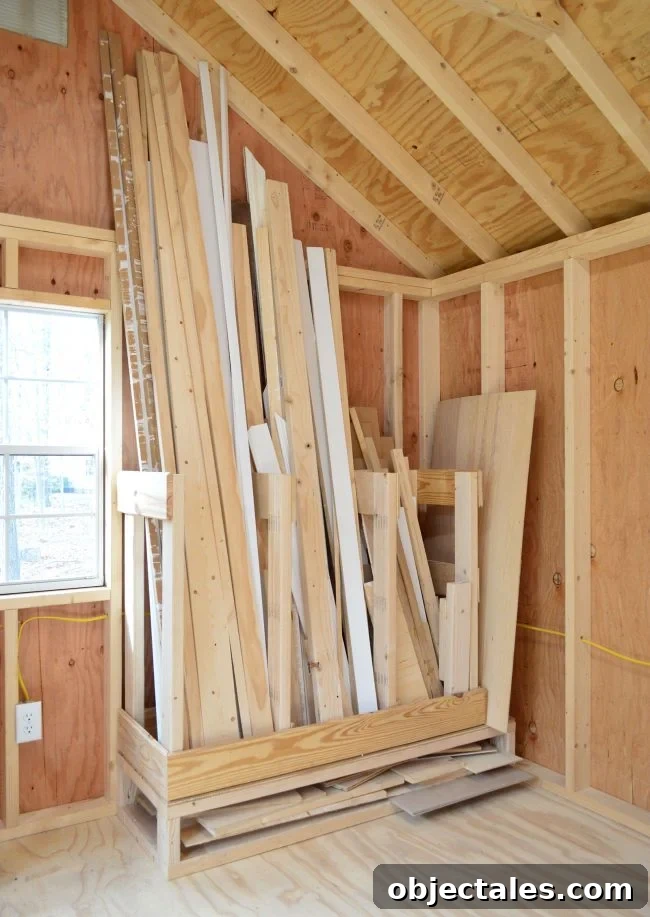
It may not be the most polished project online, and the wood-on-wood tones make it a little hard to photograph, but it’s a huge improvement over the chaotic garage pile we started with—and it’s practical and built mostly from scraps.
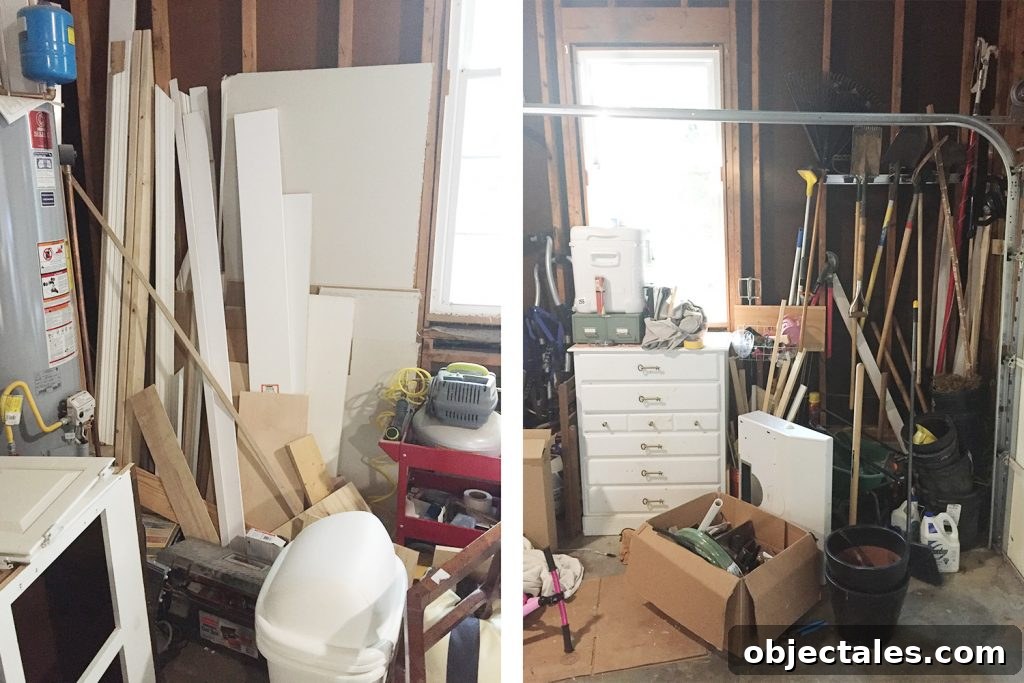
Step 1: Assess Your Scrap Wood Pile
We began by moving all of our scrap wood into the shed to get a clear picture of what we had. The pile included long boards, short trim pieces, and various-sized plywood scraps. Rather than sorting by wood type or intended use, we decided to organize by size, since that matched our most common needs: quick access to similar-length pieces.
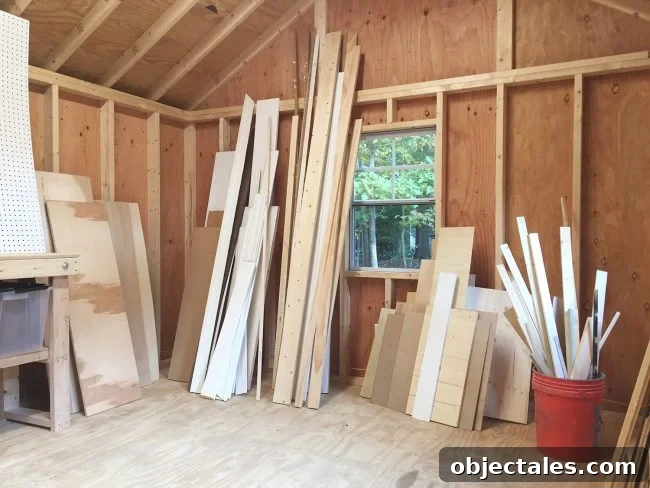
Many storage ideas online were elaborate—rotating racks, folding systems—but I wanted something simple, sturdy, and built mostly from what we already had. I did buy a couple of new 2x4s for structural stability, but most of the material came from scraps.
Step 2: Build a Base for Flat Storage
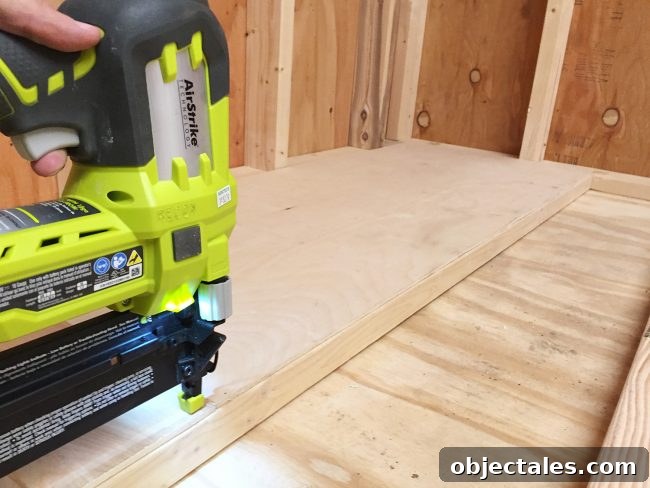
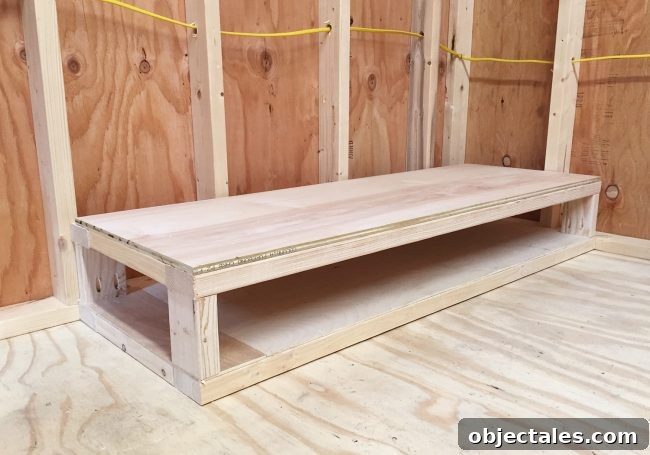
For the base, I cut 2x4s into pieces and assembled two matching rectangular frames. The sizes were determined by the corner space I planned to use, but you can adjust dimensions to fit your area. I used pocket holes to join the frame members and then attached thin plywood scraps over the frames to create flat platforms for storing panels and short pieces.
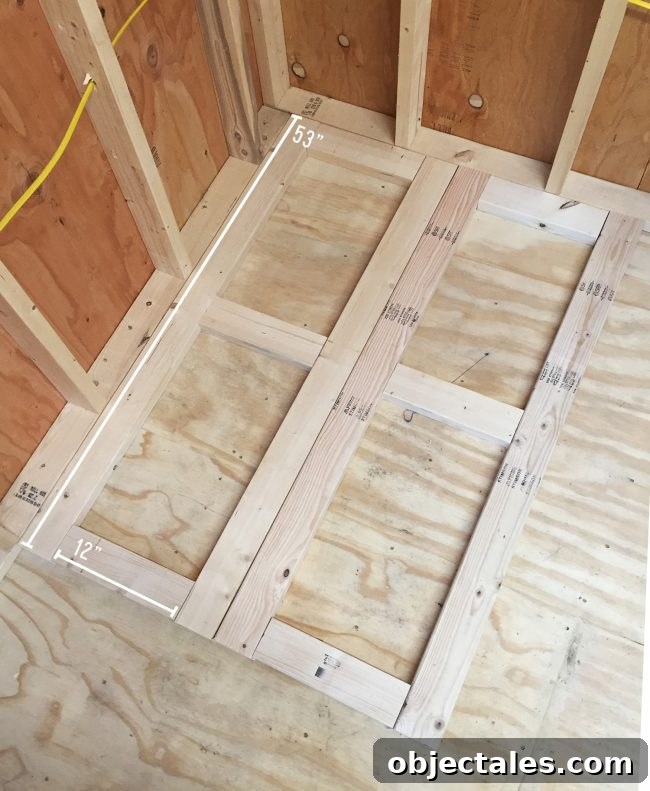
Securing the plywood to the frames made two sturdy, flat platforms that keep sheet goods and bundled scrap panels off the floor and easy to slide in and out.
Step 3: Create a Low Storage Cubby
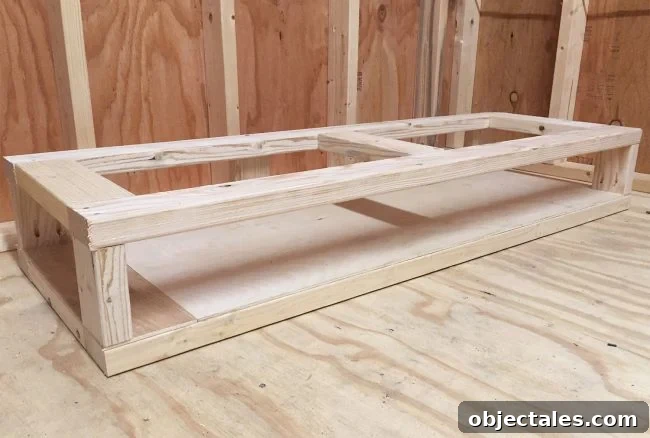
Next, I cut short 2×4 posts and attached them along the sides and back of the bottom platform to form a low cubby. The front remained open for sliding pieces in and out. After positioning the posts, I placed the second platform on top and screwed it down through the plywood into each post for a secure connection.
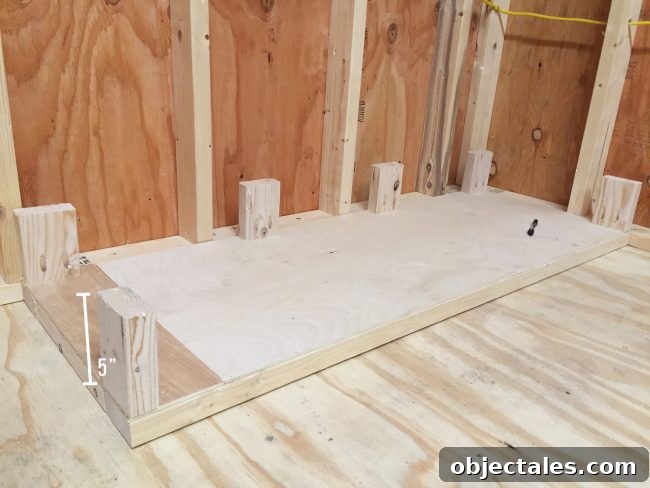
I then attached a thicker 1/2″ scrap plywood sheet as the top of this lower cubby. That heavier panel added rigidity and better supported the weight of wood stacked above it.
Step 4: Add Vertical Dividers
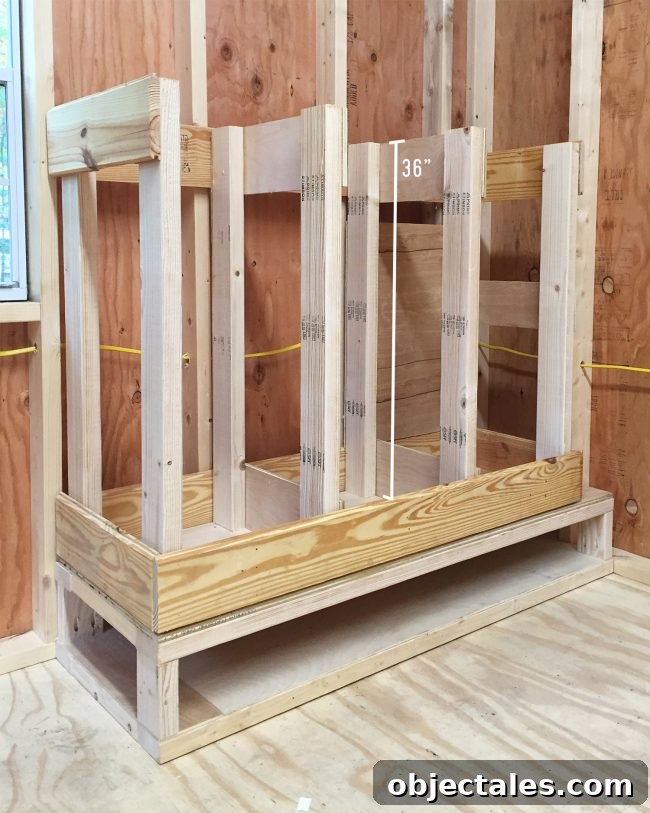
To form the vertical storage bays, I cut eight three-foot 2×4 posts and attached them to the base using pocket holes and screws. These dividers create narrow cubbies ideal for leaning boards by length. I reinforced the assembly with a perimeter frame nailed around the top and bottom, keeping the top front area open so boards can be leaned in easily. Be sure to include a bottom front rail so smaller boards don’t slip forward out of the bays.
Step 5: Install Backing to Contain Small Pieces
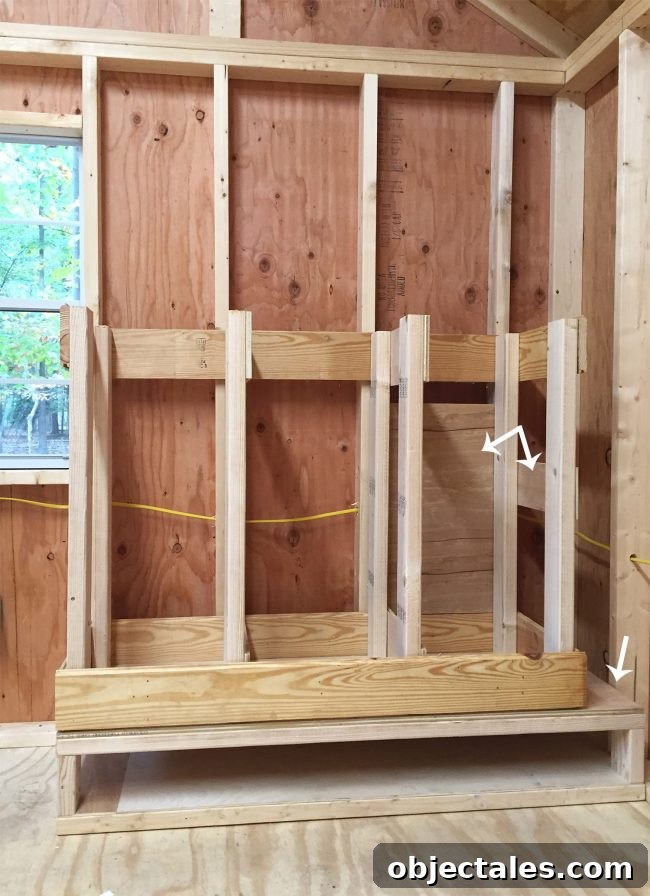
For the smallest compartment on the far right, I added extra back and side panels to prevent thin scraps from falling through gaps. I also left a vertical slot along the right edge where large flat sheets can be slid in and stored upright against the shed wall. These small details help keep everything tidy and accessible.
Step 6: Fill with Your Scrap Wood
Once assembled, I sorted the leftover lumber into the cubbies by length. Having everything grouped by size makes it much easier to find the right piece for quick projects, and I’ve already made fewer trips to the store as a result. The system holds long boards, short moldings, and flat panels all in one footprint, freeing up floor space and reducing clutter.
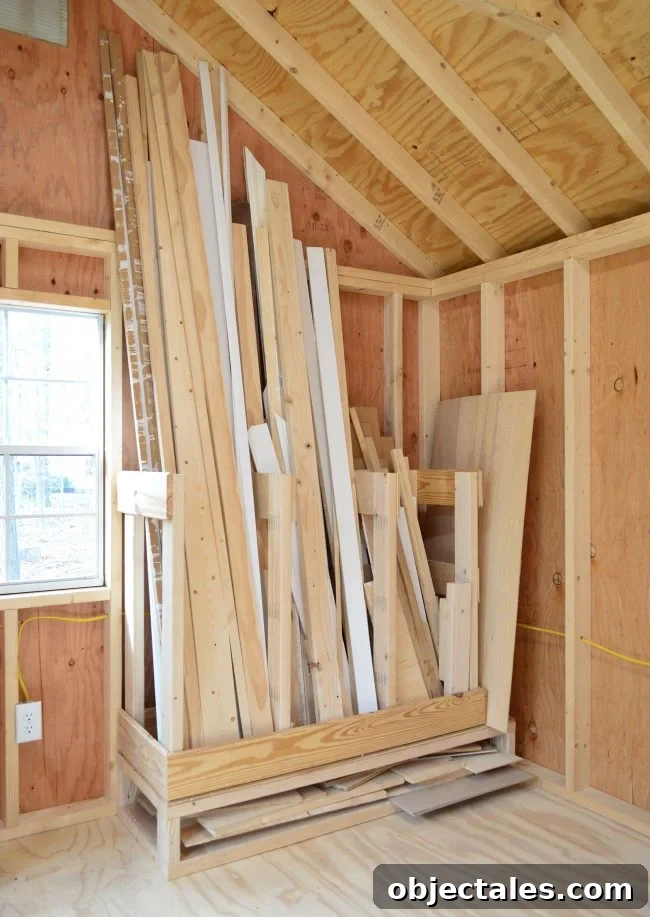
One small upgrade I may add is a mounted bucket or basket for tiny offcuts and blocks. Those small pieces are handy as painting or spray-paint supports, or for quick shims, and a dedicated container will keep them from cluttering the shelves. Full disclosure: I have trouble throwing away wood, so this solution helps me keep everything useful and organized.
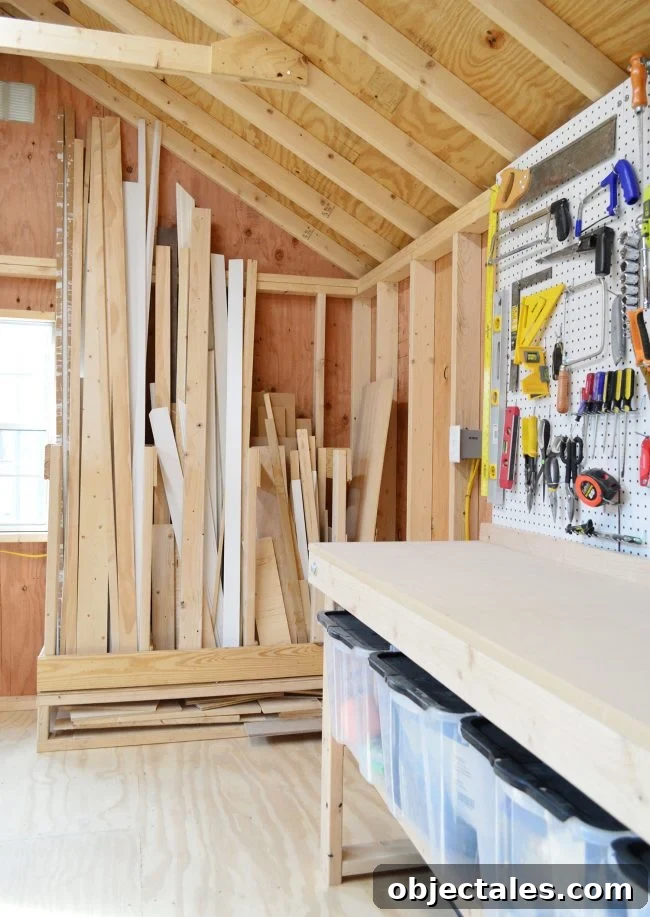
This straightforward design is flexible: change the number of dividers or the overall dimensions to match your available space and typical scrap sizes. Built primarily from leftover lumber, it’s an economical and practical way to bring order to a growing collection of materials while keeping everything easy to access.
[ad_2]