[ad_1]
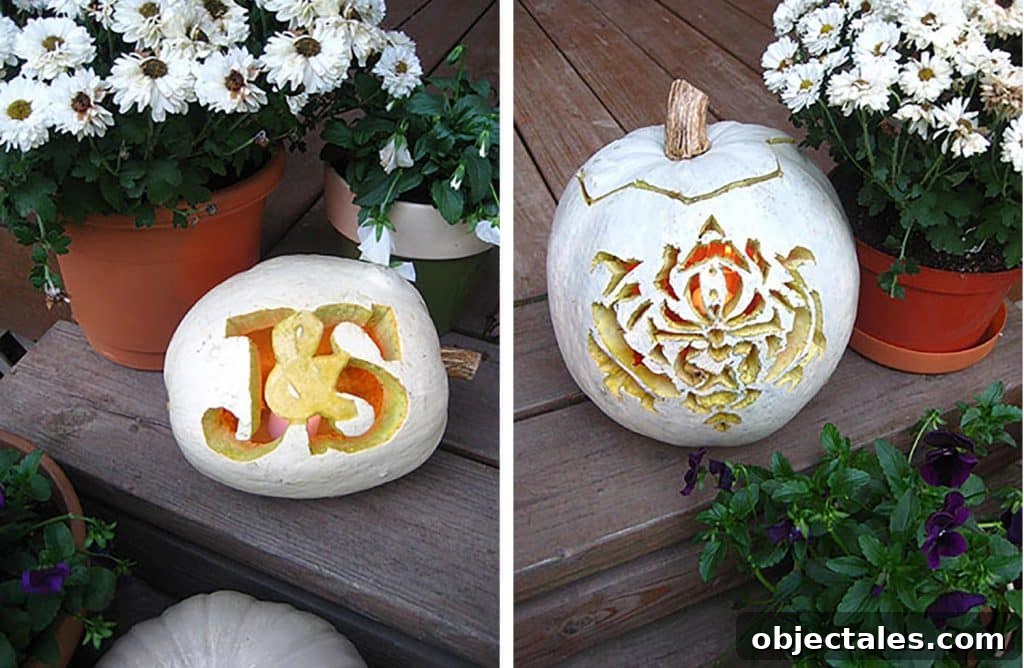
Looking for a fresh, stylish idea for your pumpkin carving this season? Try two homemade-stencil designs we created: a couples’ monogram jack-o-lantern and a detailed damask-pattern pumpkin. Both bring a modern twist to traditional carving and work particularly well on white pumpkins for a contemporary Halloween display.
Choosing The Right Pumpkin
We bypassed the classic orange pumpkin in favor of white varieties. White pumpkins have a clean, modern look that complements more intricate or unexpected designs. Their pale surface makes carved patterns stand out differently than an orange gourd, and they lend themselves well to minimalist or elegant motifs. Keep in mind that many white pumpkins have thicker skin, which can affect how you carve and how deep you need to cut to let light through.
Creating A Homemade Pumpkin Stencil
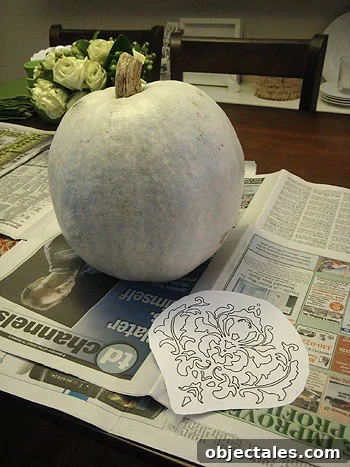
To create the damask stencil, I found an intricate pattern and converted it into a clear black-and-white line image using Photoshop. After adjusting the size to fit the pumpkin’s curvature, I printed the design on regular office paper. This straightforward approach lets you use nearly any printable pattern—ornaments, monograms, florals, or geometric shapes—and tailor it to your pumpkin’s proportions.
Transferring Your Stencil To The Pumpkin
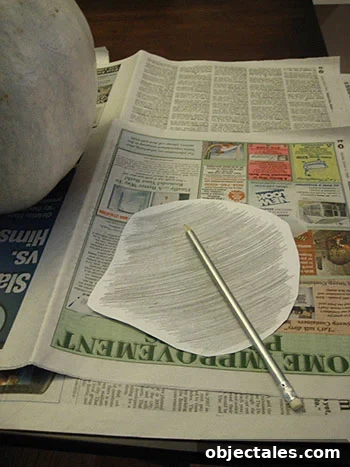
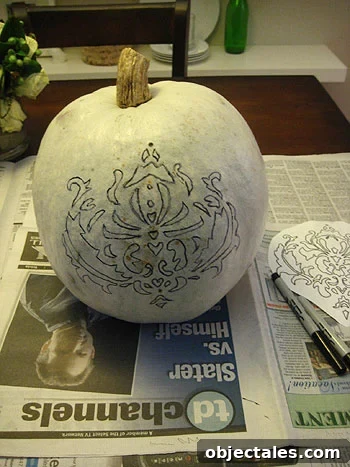
A simple art-school trick makes transfer easy: flip the printed design over and shade the entire back with pencil graphite, creating a makeshift carbon transfer. Tape the paper in place on the pumpkin with the graphite side against the rind, then trace the design firmly with a pencil. The graphite transfers a faint outline onto the pumpkin surface. To prevent smudging while you carve, run a thin permanent marker along the transferred lines to define the pattern clearly.
Carefully Carve Your Damask Pattern
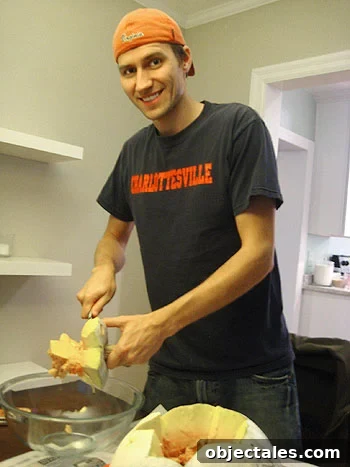
We used a small, inexpensive four-in-one pumpkin carving tool to cut the damask pattern. White pumpkins often have dense, thick flesh, so expect some resistance and take your time. Work slowly, removing small sections at a time and following the marked lines. For tiny details, shallow scrapes can create contrast without fully cutting through the rind, offering a subtle layered look when lit from inside.
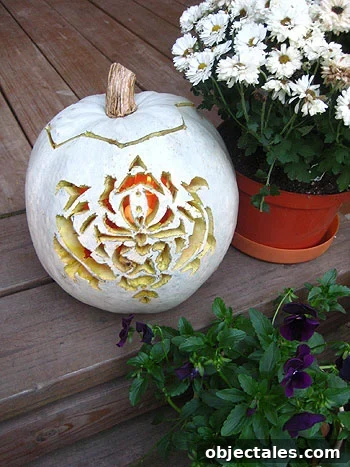
Carving the damask design was challenging at moments, and I had a few tense minutes where I thought the pattern might be ruined. Ultimately, patience paid off: the finished pumpkin displayed a refined, ornamental silhouette that drew curiosity from passersby. The damask pattern is subtle from the street, but it sparks guesses—“Is that a butterfly?” or “A monster?”—which makes it an engaging conversation piece. And yes, I survived the process with all fingers intact.
Carving A Couples’ Monogram
For the second pumpkin we kept things simpler and carved a couples’ monogram. Using the same homemade stencil method, we transferred a J&S design onto another white pumpkin. This particular gourd was a bit lopsided, so instead of cutting from the top we carved from the back and seated the pumpkin on its side. That orientation gave the finished jack-o-lantern a more unexpected presentation—proof that small adjustments or “happy accidents” can improve a design.
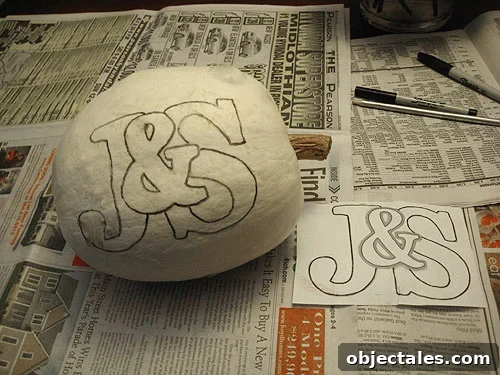
We designed the ampersand to overlap the initials. Because some elements were too delicate to cut out completely, we removed just the outer layers of rind in those areas, revealing the deeper orange flesh beneath. This scraping technique produces a layered, two-tone effect that reads well when the pumpkin is illuminated and adds depth without collapsing fragile sections.
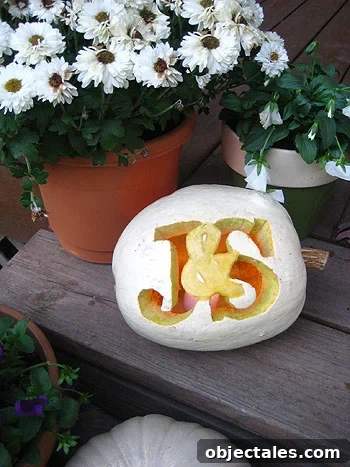
We loved how the monogram pumpkin turned out, and it inspired a new idea: carving our house numbers across a series of pumpkins—one digit per gourd. That’s a project for another weekend once our hands have recovered from this round.
Have any creative pumpkin carving tricks or original stencil ideas? Share your tips and designs—we’d love to hear what unexpected techniques you use to make your jack-o-lanterns stand out.
[ad_2]






