Imagine this: you are standing in your Minecraft base at midnight. Your armor is enchanted, your sword has seen better days, and your storage room is still somehow full of random junk you promised yourself you would organize “later.” Outside, the village bell rings. Not once. Not twice. It rings like the entire Overworld just realized you made a terrible decision.
Then you hear it.
The horn.
A raid has started.
At first, it feels heroic. Pillagers rush in. Vindicators sprint toward the village like angry tax collectors. Witches throw potions, ravagers smash through defenses, and evokers summon those tiny flying nightmares that always seem to hit you at the worst possible moment. You survive the first wave. Then the second. Then the third. Your shield is nearly broken, your food is disappearing, and your villagers are staring at you as if you personally invited this disaster.
But here is the twist: what if this chaos was not a problem?
What if you could turn raids into a machine?
What if every wave of danger became a wave of profit?
That is the power of a Minecraft raid farm. Instead of treating raids as terrifying village emergencies, you turn them into one of the most rewarding farming systems in survival mode. With the right setup, raids can become a steady source of Totems of Undying, emeralds, redstone, glowstone dust, gunpowder, bottles, saddles, crossbows, and more. In other words, a raid farm can turn you from “careful survival player” into “walking disaster with infinite second chances.”
This guide will explain what a raid farm is, why it is so powerful, how raid mechanics work, what resources you need, how to think about building one safely, and how to use it without turning your world into a laggy nightmare. Whether you are preparing for hardcore survival, building a trading empire, or simply want enough emeralds to make villagers treat you like royalty, this raid farm guide will help you understand the path to becoming truly overpowered.

What Is a Raid Farm in Minecraft?
A raid farm is a player-built system designed to repeatedly trigger and defeat Minecraft raids in a controlled location. Instead of letting raid mobs attack a real village, you build a special artificial raid area where enemies spawn, move into a kill chamber, and drop valuable loot.
The basic idea is simple: raids create powerful mobs, those mobs drop valuable items, and a farm turns that dangerous event into a repeatable loot engine.
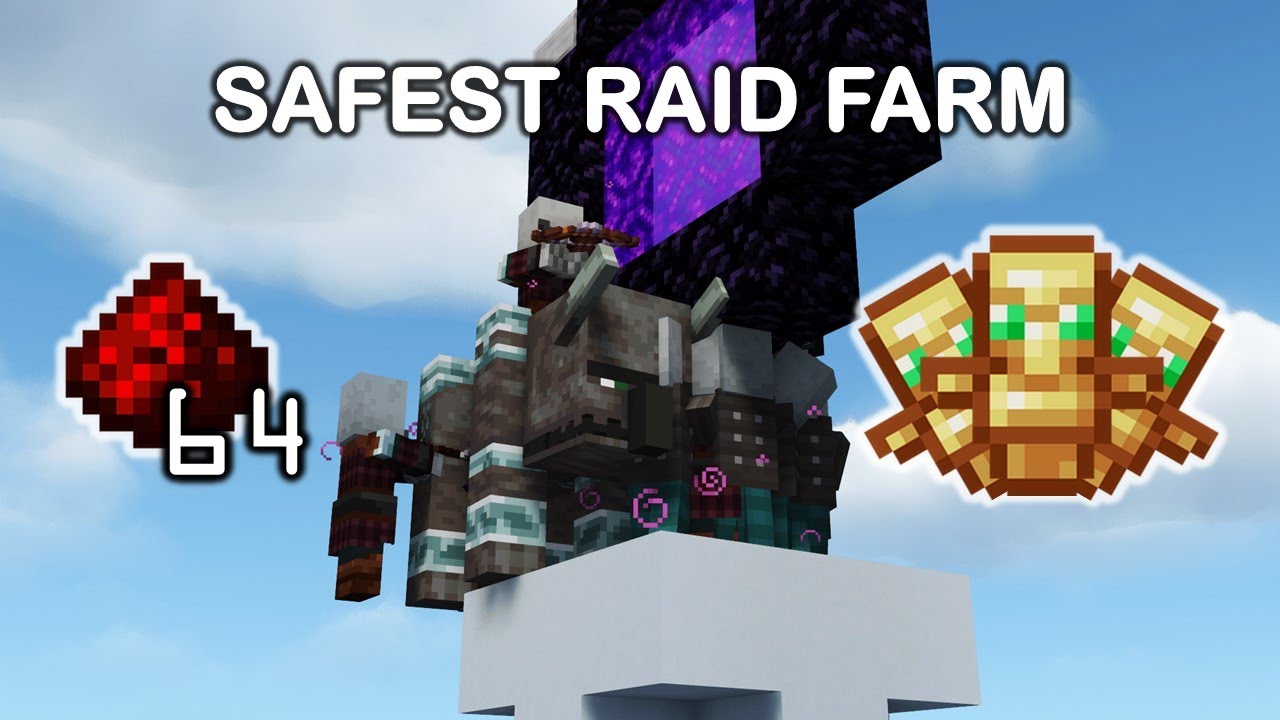
The most famous reward from raid farms is the Totem of Undying. This item is dropped by evokers and can save you from death if you are holding it. For hardcore players, totems are priceless. For regular survival players, they are still extremely useful because they let you survive situations that would normally end in disaster. Lava accident? Totem. Creeper surprise? Totem. Elytra crash into a mountain because you were looking at your second monitor? Totem.
But totems are only part of the story. Raid farms can also produce emeralds, which are incredibly useful for trading with villagers. With enough emeralds, you can buy enchanted books, tools, armor, food, building blocks, name tags, maps, and other valuable items. A raid farm does not just give you loot; it can power an entire villager trading economy.
That is why raid farms are considered one of the most powerful farms in Minecraft. They combine combat, automation, villager mechanics, hostile mob spawning, and loot collection into one high-value machine.
Why Build a Raid Farm?
There are many farms in Minecraft. Iron farms, gold farms, creeper farms, sugar cane farms, slime farms, guardian farms, and more. So why build a raid farm?
Because few farms offer such a strong combination of survival power and economic value.
A raid farm gives you Totems of Undying, which are among the strongest defensive items in the game. Having one totem is useful. Having a full chest of totems changes how you play. You can explore ancient cities with more confidence, fight bosses with less fear, fly with an elytra more aggressively, and take on dangerous projects without constantly worrying that one mistake will erase hours of progress.
Then there are emeralds. Villagers are basically Minecraft’s legal cheat code when used properly. A good villager trading hall can give you Mending, Unbreaking, Efficiency, Protection, Sharpness, and almost everything else you need. But villager trading needs emeralds. A raid farm solves that problem by producing emeralds in large quantities.
Raid farms are also exciting because they feel more dramatic than many other farms. A sugar cane farm quietly grows plants. An iron farm drops golems. A raid farm summons an army of angry illagers and turns them into loot. It is loud, dangerous, and extremely satisfying when it works.
In short, you build a raid farm because you want power. You want safety. You want emeralds. You want totems. You want to become the kind of player who walks into danger holding a backup life in each hand.

How Raids Work in Modern Minecraft
Before building a raid farm, you need to understand the basic raid system. A raid is an event where waves of illagers attack a village. The game checks for a valid village area, then spawns groups of raid mobs nearby. These mobs can include pillagers, vindicators, witches, ravagers, and evokers depending on the wave and difficulty.
In newer Minecraft versions, the Bad Omen system changed. Instead of automatically getting Bad Omen every time you defeat a raid captain, you can obtain Ominous Bottles. Drinking one gives you Bad Omen. When you enter or interact with a valid village situation while the effect is active, it can transform into Raid Omen and begin a raid after a short delay.
This matters because raid farms depend on controlled raid triggering. Older designs often relied on repeatedly gaining Bad Omen by killing captains in specific ways. Modern designs may use Ominous Bottle supply, controlled activation, and careful village placement to start raids reliably.
A village in Minecraft does not need to be a giant settlement with roads, houses, and villagers gossiping about your terrible building skills. For raid mechanics, a village can be created with a villager and a valid bed or workstation conditions depending on version and design. Raid farms use this by creating a tiny artificial village in a carefully chosen location.
Once the raid starts, the farm’s job is to control where raid mobs spawn and where they go. If the farm is designed well, mobs spawn in predictable areas, move toward the player or village center, and fall or path into a kill chamber. The player then defeats them manually, semi-automatically, or with a designed killing mechanism.
The more controlled the farm is, the safer and more efficient it becomes.
Java vs Bedrock: Why Your Edition Matters
One of the biggest mistakes players make is following a raid farm tutorial without checking the edition. Minecraft Java Edition and Minecraft Bedrock Edition often handle spawning, pathfinding, redstone, tridents, raids, and mob behavior differently. A farm that works beautifully in Java may fail completely in Bedrock. A Bedrock design may rely on mechanics that do not exist in Java.
Before building any raid farm, always confirm three things: your Minecraft edition, your game version, and whether the tutorial or design matches both.
If you play Java Edition, many raid farm designs focus on spawn control, village center positioning, player location, and fall/kill chambers. Java raid farms can be extremely efficient, but they often require precise placement.
If you play Bedrock Edition, raid farms may use different mechanics and layouts. Bedrock players often need designs specifically tested for their version because mob spawning and raid behavior can be less forgiving when copied from Java tutorials.
This article focuses on the general concept and planning behind raid farms rather than exact block-by-block instructions. That is intentional. Raid farms are version-sensitive. A good guide should help you understand why the farm works, not just tell you to place blocks blindly. Once you understand the mechanics, you can choose a tested design for your edition and avoid wasting hours building a beautiful machine that produces nothing except disappointment.

What You Need Before Building a Raid Farm
A raid farm is not usually a first-day survival project. You can build simple versions earlier, but a reliable farm works best when you already have decent gear and resources.
At minimum, you should prepare strong armor, a good weapon, food, blocks, water buckets, building materials, a villager, a bed or workstation depending on your design, storage blocks, hoppers, chests, slabs, glass, trapdoors, signs, and possibly redstone components. You may also need boats, minecarts, rails, leads, or other tools to transport villagers and control mobs.
Good armor is important because raids can be dangerous. Even if the farm is designed to keep you safe, mistakes happen. A ravager may spawn where you did not expect. A vex may reach you. A pillager may shoot you while you are adjusting blocks. A witch may throw a potion at exactly the wrong moment because witches have apparently studied comedy timing.
You should also bring backup supplies. Extra blocks, extra food, extra shields, and a spare weapon can save you from abandoning the build halfway through.
Most importantly, bring patience. Raid farms reward precision. A small mistake in villager placement, spawn platform height, kill chamber design, or player position can affect the entire system. If something does not work at first, do not instantly destroy everything. Test one part at a time.
Best Location for a Raid Farm
Location is one of the most important parts of a raid farm. You want to build somewhere that gives you strong spawn control and reduces unwanted mob interference.
Many players build raid farms over an ocean because water limits natural hostile mob spawning and gives you a large empty area. Ocean builds also make it easier to control where raid mobs appear. If there are fewer valid spawning spots nearby, the farm has a better chance of forcing mobs into the intended location.
Another option is building high in the sky. Sky raid farms can reduce interference from caves, terrain, and nearby mobs. However, they can be more dangerous to construct because falling becomes a real threat. If you build in the sky, use water, scaffolding, elytra, slow falling potions, or safety platforms. Minecraft gravity is not impressed by your confidence.
Avoid building too close to real villages unless you know exactly what you are doing. Nearby villagers, beds, bells, and workstations can confuse the raid center or cause raids to behave unpredictably. A raid farm should use a controlled artificial village, not accidentally connect to a nearby settlement.
You should also consider convenience. The farm should be far enough from your main base to avoid accidents, but not so far that using it becomes annoying. If possible, connect it with a Nether portal, ice boat path, railway, or elytra route.

The Core Parts of a Raid Farm
Most raid farms have several key components. Designs vary, but the same basic ideas appear again and again.
1. The Artificial Village
The artificial village is the heart of the farm. It usually involves at least one villager and the required block setup that makes the game recognize a village. This is what allows the raid to start in a controlled location.
The villager must be protected at all costs. If the villager dies, the farm may stop working. Build a safe chamber with solid blocks, glass, lighting, and no access for raid mobs. Think of the villager as the farm’s nervous system. Also, think of them as a very underpaid employee who did not agree to be part of your illager profit machine.
2. The Player Station
The player station is where you stand during the raid. In many designs, your position helps determine where mobs spawn and how they move. The station should protect you from arrows, vexes, witches, and accidental ravager chaos.
A good player station includes visibility, safety, and access to loot or controls. You should be able to attack mobs or activate the farm without exposing yourself too much.
3. The Spawn Area
The spawn area is where raid mobs appear. A reliable farm controls this area carefully. The goal is to prevent mobs from spawning in random locations and encourage them to spawn where the farm can handle them.
Spawn platforms may use specific blocks, shapes, heights, or positions depending on edition and design. Some farms use water streams, trapdoors, or pathfinding tricks to move mobs after they spawn.
4. The Funnel or Transport System
Once mobs spawn, the farm needs to move them into a kill chamber. This can be done with water, fall paths, pathfinding, bubble columns, or other mechanics. The simpler and more reliable the transport system, the better.
If mobs get stuck, the raid may not progress. Each wave usually needs to be cleared before the next wave begins. That means stuck mobs are not just annoying; they can stop the entire farm.
5. The Kill Chamber
The kill chamber is where raid mobs are defeated. Some designs require the player to kill mobs directly for drops. Others use semi-automatic methods. The design must handle different raid enemies, including dangerous mobs like ravagers and evokers.
Loot collection should be built around the kill chamber. Hoppers, chests, item filters, and storage systems can help manage the drops.

Totem of Undying: The Real Prize
The Totem of Undying is the main reason many players build raid farms. When held in your hand, it activates if you would otherwise die, saving you and applying survival effects. It is one of the most powerful safety items in Minecraft.
Evokers drop Totems of Undying, and raids can spawn evokers in later waves depending on difficulty and version. This makes raids a renewable source of totems. Once your raid farm is working, you can collect enough totems to use them regularly instead of saving one forever in a chest “for emergencies.”
We all know that chest. The one with the rare items you never use. The enchanted golden apple. The best potion. The perfect bow. The one totem you are too scared to hold because it feels too valuable. A raid farm changes that mindset. Suddenly, totems become tools, not museum pieces.
This is especially important in hardcore mode. In hardcore, one death ends the world. A Totem of Undying is not just useful; it is a second chance. For hardcore players, a raid farm can be one of the most important long-term survival investments.
Emerald Farming: Build a Villager Economy
Emeralds are the second major reward. Raid mobs can drop emeralds, and with a strong farm, these emeralds can add up quickly. Once you have a steady emerald supply, villagers become much more powerful.
You can trade emeralds for enchanted books, diamond gear, tools, food, glass, quartz, redstone, name tags, and more. Librarians can provide essential enchantments. Farmers can sell useful food. Clerics can trade magical items. Toolsmiths, weaponsmiths, and armorers can help gear you up. Masons can provide building blocks.
A raid farm and a villager trading hall work beautifully together. The raid farm produces emeralds. The trading hall converts emeralds into gear, resources, and upgrades. This creates a powerful survival loop.
In practical terms, this means less grinding. Instead of mining diamonds for every tool, you can trade. Instead of searching endlessly for one enchantment, you can buy it. Instead of worrying about repair costs, you can get Mending. A good emerald supply makes your world smoother, faster, and more flexible.
Loot You Can Expect from a Raid Farm
Raid farms are famous for totems and emeralds, but they can produce several other useful drops too. Depending on your version, difficulty, and farm design, you may collect items such as crossbows, arrows, saddles, redstone dust, glowstone dust, sugar, glass bottles, sticks, gunpowder, and other mob drops.
Some of these items are more useful than others. Emeralds and totems are the stars. Redstone and glowstone can be useful for brewing and technical builds. Gunpowder is always welcome if you use rockets. Saddles can be handy. Crossbows may mostly become fuel for your “why do I have so many crossbows?” chest.
Because raid farms can produce many item types, storage matters. A small chest may fill quickly. If you plan to use the farm often, build a proper collection system with multiple chests or item filters. Otherwise, you may create a new problem: a loot farm that produces so much loot you spend more time cleaning storage than playing the game.
That is a very Minecraft problem to have.3
How to Make a Raid Farm Safer
Raid farms can be dangerous during testing. Before you run the farm seriously, safety-proof the build.
First, protect the villager. Use solid blocks, glass, lighting, and distance from mob paths. Make sure vexes and other enemies cannot easily reach them. If the villager dies, the farm may break.
Second, protect yourself. Build a player chamber with walls, slabs, trapdoors, or glass barriers. Make sure you can attack mobs without being overwhelmed. Keep an escape route ready.
Third, prevent accidental village connections. Do not place extra beds, villagers, bells, or workstations nearby unless the design requires them. Random village mechanics can shift the raid center or create weird behavior.
Fourth, control mob spawning. Light nearby spaces, build over water when possible, and reduce valid spawn locations outside your intended platform. The fewer random spawn spots exist, the more reliable the farm becomes.
Fifth, prepare for vexes. Evokers can summon vexes, and vexes are one of the most annoying threats in raid farms because they can pass through blocks. Good designs kill evokers quickly or position them so they cannot cause much trouble. Keep armor strong and food ready.
Common Raid Farm Problems and Fixes
Even good raid farms can have problems. Here are some common issues and what they usually mean.
The Raid Does Not Start
If the raid does not start, check your Bad Omen or Raid Omen status, your artificial village setup, your villager, and your version mechanics. Make sure the villager is alive and the village is valid. If you are using Ominous Bottles, confirm you are triggering the effect properly.
Mobs Spawn in the Wrong Place
This usually means there are valid spawn locations outside your intended platform. Check nearby land, caves, roofs, blocks, and terrain. Building over an ocean or high in the sky can reduce this problem.
Raid Mobs Get Stuck
If mobs get stuck, waves may not finish. Check water streams, trapdoors, pathfinding routes, corners, and kill chamber entrances. Sometimes one tiny block can ruin the flow.
Vexes Keep Killing You
Evokers may be alive too long. Improve your kill chamber speed, upgrade your weapon, or use a design that handles evokers more safely. Strong armor and totems help, but prevention is better.
The Farm Works Once, Then Breaks
This can happen if the village center changes, the villager disconnects from the required block, mobs remain alive somewhere, or the raid state becomes confused. Reset carefully, check the villager, and clear all remaining raid mobs.
Tips for Better Raid Farm Efficiency
If your raid farm works but feels slow, focus on efficiency. The goal is to reduce downtime between waves and make sure mobs die quickly.
Use a strong sword with Looting if the design benefits from player kills. Keep your weapon repaired with Mending. Use Sharpness or Smite depending on what your farm handles best. Maintain armor durability. Bring food and backup gear.
Improve mob movement. If enemies take too long to reach the kill chamber, the farm slows down. Water streams, fall paths, and pathfinding tricks should move mobs quickly and reliably.
Improve storage. A farm that stops because chests are full is not efficient. Add more chests, shulker loaders, or item filters if needed.
Test in short sessions. Run the farm for a few minutes, watch where mobs spawn, check where items go, and identify bottlenecks. Fix one issue at a time. Do not randomly change ten things at once unless you enjoy creating mysteries for yourself.
Is a Raid Farm Too Overpowered?
Some players feel raid farms are too strong. And honestly, they have a point. A working raid farm can produce huge amounts of valuable loot. It can make death less scary, emeralds easier to obtain, and villager trading incredibly powerful.
But Minecraft is a sandbox. The fun comes from choosing your own level of challenge. If you enjoy technical farming, automation, and building powerful systems, a raid farm can be one of the most satisfying projects in the game. If you prefer a slower survival experience, you can limit how often you use it or build a smaller version.
The best approach is to use the farm in a way that keeps the game fun for you. In hardcore, totems may feel essential. In multiplayer, emeralds may support a shared economy. In creative survival worlds, the farm may simply be a cool technical build.
Being OP is fun, but staying interested is more important. Build the farm because you enjoy the process and the rewards, not because you feel forced to optimize everything.
Raid Farm Design Ideas
A raid farm does not have to be ugly. Many players build farms as floating platforms with exposed redstone and random blocks, then hide them forever. That works, but you can do better.
Try building your raid farm as a fortress over the ocean. Add towers, banners, dark stone, and dramatic bridges. Make it look like a war machine designed to challenge illagers. Or build it as a sky temple, where raids are summoned above the clouds and defeated in a glowing chamber.
You can also build a “totem factory” theme with emerald-colored glass, storage halls, and villager-powered control rooms. If you play on a server, make the raid farm a public utility building where players can trade, repair gear, and collect totems before dangerous adventures.
Adding style makes the farm feel like part of your world instead of just a machine. Minecraft is always better when function and design work together.
Final: Totems, Emeralds, and Total Survival Confidence
A raid farm is one of the most powerful projects you can build in Minecraft. It takes planning, resources, and careful testing, but the rewards are enormous. Totems of Undying give you second chances. Emeralds fuel villager trading. Extra loot supports brewing, crafting, storage, and future projects.
More importantly, a raid farm changes your mindset. Dangerous exploration becomes less terrifying. Villager trading becomes easier. Hardcore survival becomes more manageable. Boss fights feel less risky. You stop treating every totem like a sacred artifact and start using them as part of your normal adventure kit.
That is when you know the farm has done its job.
Of course, raid farms are not magic. They require correct version-specific design, safe villager placement, spawn control, and good loot storage. They can break if built carelessly. They can become dangerous if tested without preparation. But once everything works, the result is one of the most rewarding systems in the entire game.
So if you are ready to turn raid chaos into profit, build your artificial village, prepare your Ominous Bottles, protect your villager, and design a kill chamber worthy of the loot it will produce.
The illagers thought they were attacking a village.
They were actually walking into your emerald-powered totem factory.
And that is how you become OP in Minecraft.