[ad_1]
Whether you plan to paint a chair, a table, or any wooden piece of furniture, the basic process is the same. With a little preparation and patience you can transform worn or dated pieces into something fresh and durable.

For example, this table and its accompanying chairs began as thrifted pieces with a golden blond tone. A few hours of work and a few simple supplies turned them into a bright white set that looks much more modern and polished.
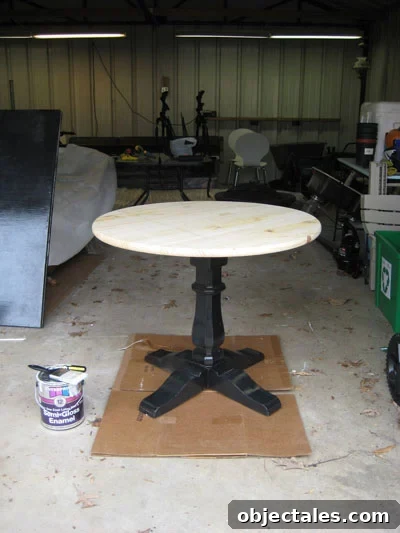
A fresh coat of white paint can take a piece from thrift-store to boutique quality for a fraction of the cost, and the steps below will guide you through the process so you get a smooth, long-lasting finish.

Here’s a clear, step-by-step method to follow:
Step 1 – Evaluate the surface. Start by inspecting the piece. If the finish is glossy or sealed (varnish or lacquer), lightly sand the entire surface with 100-grit sandpaper to scuff the finish and give primer something to grip. If the surface is dry, chalky, or unfinished, you can usually skip the aggressive sanding and move on to priming. The goal in this step is simply to create a slightly roughened surface so subsequent coats adhere properly.
Step 2 – Prime the piece. Use a good stain-blocking primer to prevent stains and tannins from bleeding through your paint and to help the paint adhere. Oil-based primers are common and effective; there are also low-VOC water-based stain-blocking primers that perform well and are less odorous. Apply one even coat with a small foam roller or quality brush. The primer does not have to be artistically perfect—just fully cover the surface without leaving globs or thick drips. Allow the primer to dry completely before moving on.
Step 3 – Apply the paint. Choose a durable latex paint in a semi-gloss or satin finish for furniture because these finishes are easy to wipe clean and resist wear. Apply two thin, even coats rather than one thick coat. Thin coats reduce brush strokes and roller marks and promote a smoother, more professional look. Small foam rollers minimize brush marks and dripping and are beginner-friendly; however, a quality brush can provide excellent results if you apply paint thinly and allow proper drying time between coats. Avoid painting latex directly over old oil-based paint without appropriate preparation, as that can lead to adhesion problems.
When painting, aim for very thin layers—think the thickness of an eggshell or a sheet of paper. It’s better to do three or four thin coats than one or two heavy ones. Let each coat dry fully before applying the next to avoid drag marks or bubbles.
Step 4 – Optional protective topcoat. For added durability and a wipeable surface, consider applying two thin coats of a clear, water-based protective finish. A clear gloss water-based polycrylic or a low-VOC acrylic protective finish will protect the paint without yellowing. Apply thin, even coats and allow full drying between coats. Working thinly reduces brush or roller drag and preserves a smooth sheen. If the piece will be used around food or in a high-traffic area, this extra step is worthwhile.
- Minwax Water-Based Polycrylic Protective Finish in Clear Gloss is a widely available option.
- Safecoat Acrylacq is a low-VOC, non-toxic alternative often sold through specialty retailers.
If you add poly, make sure the underlying paint is completely dry and cured to the touch. Going over semi-wet paint or poly to smooth it out will create drag marks, so always work from one side to the other and avoid reworking areas until they are fully dry.
Step 5 – Allow proper curing time. Even after paint feels dry, the finish needs time to fully cure and harden. Wait at least 72 hours before placing objects on the painted surface to avoid dents or impressions. For the best results, especially for tabletops or frequently used furniture, wait five days. Factors such as humidity and the thickness of your primer, paint, and topcoat affect curing time, so err on the side of patience.
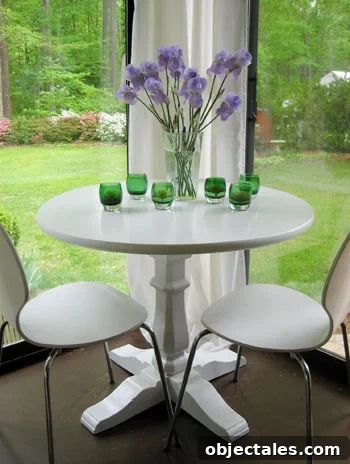
Painting furniture is straightforward when you take it step by step. With careful surface preparation, thin coats of primer and paint, and patience while everything dries and cures, you can confidently update almost any wooden piece in an afternoon and enjoy a lasting finish that looks professional.
Note: If your furniture is not solid wood or is covered with laminate, melamine, or another smooth manufactured surface, consult a paint specialist at a hardware store for specific recommendations. Roughing the surface slightly and using the appropriate primer and paint for that material will give the best outcome.
If you’d like guidance for related projects such as painting cabinets, brick fireplaces, or wood paneling, search tutorials specific to those surfaces to learn the best techniques and products for each.
[ad_2]






