If you want a powerful trading hall in Minecraft, you need one thing above all else: a steady supply of villagers.
You can drag villagers in from random villages one by one, but that gets old very quickly. It is slow, messy, and frustrating. A much better solution is to build a villager breeder—a system that keeps producing baby villagers so you can keep expanding your trading hall, replace bad trades, and grow your survival world much faster.
And once you understand how villager breeding actually works, it becomes one of the most valuable systems in the entire game.
A good villager breeder helps you:
- create new villagers whenever you need them
- build a larger trading hall much faster
- replace villagers with bad professions or bad layouts
- support iron farms and other villager-based systems
- stop relying on finding more villages far away
Villager breeding in modern Minecraft revolves around beds, food, and villager willingness. In current versions, villagers need access to extra valid beds and enough food to become willing to breed. Common valid foods include bread, carrots, potatoes, and beetroots, and a baby villager appears when the breeding conditions are met.
This guide is written for beginners, but it is detailed enough to be genuinely useful if you want a clean long-term setup. You will learn:
- how villager breeding works
- what materials you need
- how to build a practical breeder in survival
- how to connect it to a trading hall
- how to move babies out automatically
- how to fix the most common problems
Let’s build a villager breeder that is actually useful—not just a random box with beds.

Why You Need a Villager Breeder in Survival 💡
A lot of players wait too long before building one. That is usually a mistake.
A villager breeder is not just a “nice extra.” It is a core progression system if you want to trade seriously.
What a villager breeder helps with
| Benefit | Why It Matters |
|---|---|
| More traders | Lets you build out librarians, toolsmiths, armorers, farmers, and more |
| Faster trading hall growth | You stop depending on rare village finds |
| Easier trade rerolls | Bad villager? Replace it quickly |
| Iron farm support | Many iron farms rely on villager population |
| Long-term survival power | More villagers means more emeralds, books, gear, and utility |
Tip: If your goal is mending books, diamond gear trades, or a big emerald economy, a villager breeder is one of the best “infrastructure” builds you can make early to mid game.
How Villager Breeding Actually Works 🧠
Many players overcomplicate villager breeding. The core idea is simple:
Villagers will breed when they have:
- at least 2 villagers
- enough food
- enough valid beds
- willingness to breed
The food requirement
Villagers can become willing using these food types:
- 3 bread
- 12 carrots
- 12 potatoes
- 12 beetroots
The bed requirement
You need more beds than current villagers, because the baby needs an available bed. A common beginner-friendly rule is:
- 2 adult villagers
- 3 beds minimum
That gives the baby an open bed to connect to. Sources describing current breeding mechanics consistently note that villagers need extra beds and enough space/access around them to breed successfully.
The hidden “willingness” part
Villagers do not breed just because beds exist. They also need to be “willing,” which is increased by food and can also be influenced by successful trading in some cases.
Pro Tip: Workstations are useful for your future trading hall, but they are not the key requirement for breeding. Beds + food + valid access are what matter most.

Quick Villager Breeder Checklist ✅
Before building, make sure you have the essentials.
| Requirement | Recommended Amount |
|---|---|
| Adult villagers | 2 |
| Beds | 3 minimum |
| Food | Plenty of bread, carrots, or potatoes |
| Building blocks | 2–4 stacks |
| Trapdoors / signs / slabs | Small amount |
| Water bucket | 1 |
| Fences / walls / glass | Optional but useful |
| Boat or minecart | Great for transport |
| Lighting | Torches or lanterns |
Best Place to Build a Villager Breeder 📍
Location matters more than beginners expect.
You can build a breeder almost anywhere, but some places make your life much easier.
Best breeder location traits
- close to your trading hall
- not too close to unrelated village beds
- easy to access by rail, water, or boat
- safe from zombies and random mob attacks
- flat enough to build cleanly
- easy to expand later
Good location options
- next to your base
- above your future trading hall
- a short rail line away from your base
- on a platform near your villager district
Places to avoid
- too close to a natural village center with random beds
- scattered terrain with too many pathfinding obstacles
- dark caves or dangerous ravines
- cramped interiors that make transport annoying
Warning: If there are other nearby beds or villagers connected to a village system you forgot about, your breeder can behave inconsistently. Keep the area controlled and predictable.

The Best Beginner Design: Simple Breeder for a Trading Hall 🏗️
There are many villager breeder designs, but for survival, the best one is usually:
- easy to build
- low resource cost
- reliable
- simple to troubleshoot
- easy to connect to baby transport
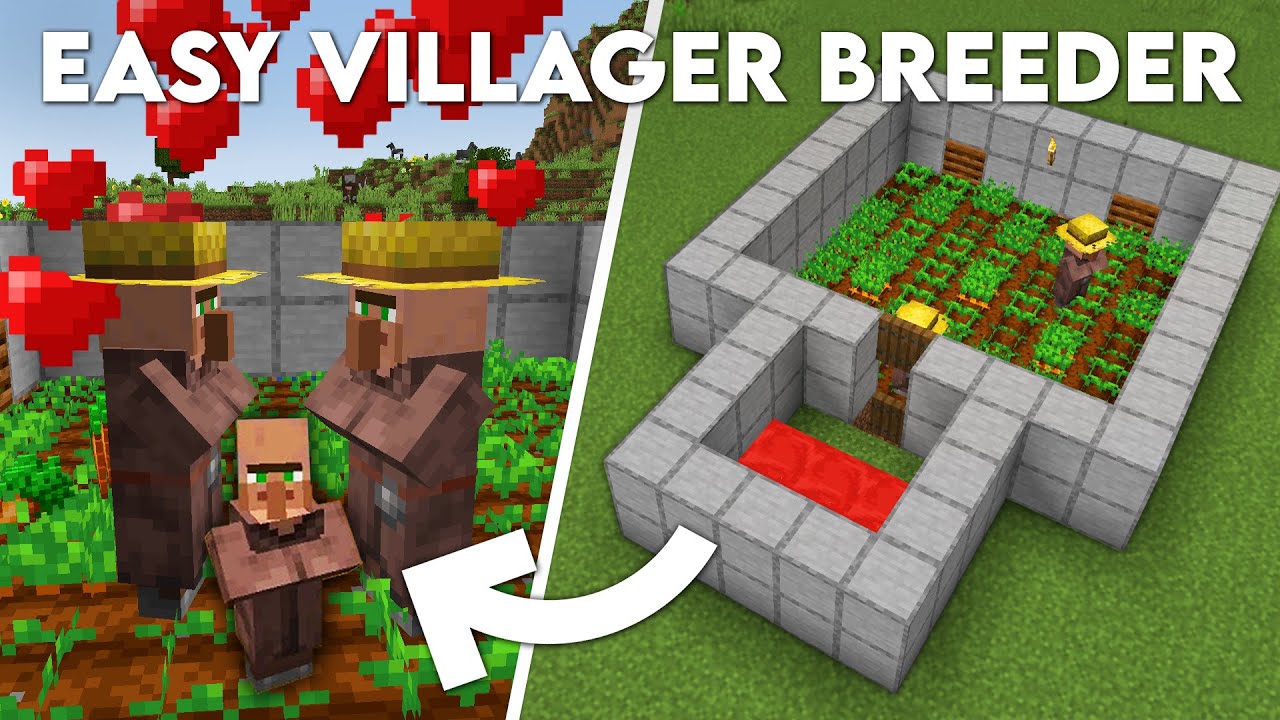
A practical beginner design often includes:
- a small farming area
- 2 adult villagers
- 3+ beds
- a contained breeder room
- a drop chute or water stream to move babies away
This works because the two villagers remain in the breeding zone while the baby gets separated and sent toward your holding area or trading hall intake.
Basic Villager Breeder Layout
Here is the simplest structure concept:
Core components
- Breeding chamber
- Bed area
- Food handling area
- Baby exit path
- Holding cell or transport line
Simple flow
- adults live in breeder
- they get food
- baby villager spawns
- baby moves or drops out of the breeder
- adults stay in place
- you repeat forever
That is the whole system.

Suggested Starter Breeder Build Materials 🧱
You do not need expensive materials. Use what you already have.
| Material | Suggested Amount | Purpose |
|---|---|---|
| Solid blocks | 2–4 stacks | Main structure |
| Beds | 3–6 | Breeding requirement |
| Trapdoors | 4–10 | Pathing and containment |
| Glass | Optional | Visibility |
| Water bucket | 1 | Baby transport |
| Slabs / stairs | A few | Path control |
| Torches / lanterns | 8+ | Safety |
| Fence gates / doors | Optional | Access and maintenance |
Tip: Glass makes the breeder feel cleaner and helps visually confirm whether villagers are breeding, pathing correctly, or getting stuck.
Step-by-Step: How to Build a Villager Breeder for a Trading Hall 🔧
Below is a clean beginner-friendly version.
Step 1: Build the Main Platform
Create a compact structure that gives villagers room to stand, move, and access beds.
A good starter size is roughly:
- 9×9
- or 7×9
- with walls around the edge
This does not need to be huge. Compact is usually better because it is easier to debug.
Build notes
- make it well lit
- keep the floor simple
- leave space for a crop patch or feeding lane
- create a clear front side where babies will exit
Step 2: Place the Beds Correctly 🛏️
Beds are one of the most important parts of the system.
Place at least 3 beds for your starting breeder:
- 2 adults
- 1 extra for the baby
Keep them in a reachable, valid setup with enough open space above. Multiple current guides note that villagers need access to beds and that extra beds are necessary for new babies.
Good bed habits
- keep the bed area obvious and uncluttered
- avoid weird block collisions above the beds
- do not bury beds in awkward half-block spaces
- do not mix breeder beds with random nearby beds
Pro Tip: If your breeder “looks correct” but no baby appears, bed access is one of the first things to inspect.

Step 3: Add the Adult Villagers 👨🌾👩🌾
Bring in 2 adult villagers.
You can move them using:
- boats
- minecarts
- water channels
- rail lines
For most survival players, boats are the cheapest early option, and minecarts are the smoothest if your breeder is farther away.
Best villager transport choice
| Method | Best For | Difficulty |
|---|---|---|
| Boat | Short distances, flat terrain | Easy |
| Minecart | Long or uphill routes | Medium |
| Water stream | Controlled downhill movement | Medium |
| Nether transport | Very long-distance relocation | Advanced |
Tip: Always move your first two breeder villagers safely. Once the breeder works, moving villagers becomes much easier forever.
Step 4: Give Them Food 🥕🍞🥔
This is where the magic starts.
Villagers need enough food to become willing to breed. Reliable current sources list the common requirements as:
- 3 bread
- 12 carrots
- 12 potatoes
- or 12 beetroots per villager breeding cycle context
Best foods to use
For a breeder, the most common and practical are:
- carrots
- potatoes
- bread
Which is best?
Here is a practical comparison:
| Food | Good for Breeder? | Notes |
|---|---|---|
| Carrots | Excellent | Easy to farm in bulk |
| Potatoes | Excellent | Also easy and reliable |
| Bread | Good | Great if you have lots of wheat |
| Beetroots | Works, but less popular | Usually less efficient feeling |
If your breeder includes a small farm with a farmer villager, carrots or potatoes usually feel best in survival.

Step 5: Create the Baby Exit System 👶➡️
A villager breeder becomes truly useful when the baby leaves the breeder automatically.
If the baby stays inside the same small chamber forever, the system becomes clogged, and your breeder will become less useful or stop producing cleanly for your trading hall workflow.
Best baby exit methods
- small drop chute
- water stream
- trapdoor pathing trick
- collection cell below the breeder
A common approach is:
- adults stay safely in the breeder area
- baby moves into a lower tunnel or water channel
- baby is carried to a holding pen
This makes the breeder feel “infinite” in practice.
Pro Tip: The breeder is only half the build. The baby extraction system is what turns it into a real trading hall machine.
Step 6: Move Babies to a Holding Area
Do not send newborn villagers directly into a messy crowd.
Instead, create a clean holding chamber where babies can grow safely for around 20 minutes before becoming adults. Several current guides note that baby villagers grow into adults in about 20 minutes.
Good holding cell features
- safe and well-lit
- no zombie access
- easy to sort or move later
- enough space for a few villagers
- close enough to your trading hall transport line
Great options
- small waiting room
- rail pickup station
- water-sorting lane
- single-villager staging cells

Best Villager Breeder Setup for a Trading Hall 🏛️
If your end goal is a trading hall, your breeder should not exist alone. It should connect into a bigger system.
Ideal system chain
Breeder → Baby Holding Area → Adult Sorting / Job Assignment → Trading Hall
That flow keeps everything organized.
Recommended trading hall workflow
- breed villagers
- collect babies
- let them grow safely
- move adults to job stations
- lock good trades
- send bad villagers back to overflow or replacement system
This saves huge amounts of time later.
Simple Trading Hall Integration Plan
| Stage | What Happens |
|---|---|
| Breeder | Produces babies |
| Nursery / Holding Cell | Babies grow into adults |
| Job Station Lane | Adults receive professions |
| Trade Check Area | You reroll and inspect trades |
| Final Cell | Good villagers stay in trading hall |
Tip: If you know you want lots of librarians, build your breeder close enough that transporting adults to lecterns is easy.
Manual vs Semi-Automatic vs Automatic Breeder
Not every player needs the same level of complexity.
1. Manual breeder
You throw food yourself and manage villagers by hand.
Best for: early survival, low resources
2. Semi-automatic breeder
Villagers farm and feed each other, while babies move away automatically.
Best for: most survival worlds
3. Full automation-style breeder chain
Advanced setup tied into sorter lines, holding cells, and job assignment modules.
Best for: large-scale trading hall projects
Here is the comparison:
| Type | Build Difficulty | Maintenance | Best For |
|---|---|---|---|
| Manual | Easy | Higher | Beginners |
| Semi-automatic | Medium | Low | Most players |
| Large integrated system | Harder | Medium | Big survival worlds |
For most users, a semi-automatic breeder is the sweet spot.

Best Crops for an Infinite Breeder 🌾
If you want the system to keep going smoothly, you need reliable food production.
Best crop choices
- carrots
- potatoes
- wheat if you prefer bread
Best practical choice
For many players, carrots or potatoes feel simplest because they are easy to scale and easy to feed directly into breeder logic.
If you use a farmer villager setup, crops can help maintain food circulation efficiently. Current guides also commonly present food-based breeder systems centered on these crop types.
Pro Tip: A breeder becomes much better when it is connected to a small food farm. Beds create the opportunity, but food is what keeps production going.
Villager Breeder Troubleshooting: Why Your Breeder Is Not Working 🛠️
This is the part most guides rush. Let’s do it properly.
If your villagers show hearts and then fail, or they never start at all, one of these is usually the reason.
Common villager breeder problems
| Problem | Likely Cause | Fix |
|---|---|---|
| No hearts at all | Not enough food | Feed more bread/carrots/potatoes |
| Hearts appear, then fail | Bed issue or invalid access | Recheck bed count and access |
| Baby never leaves | Exit path is bad | Fix chute or water stream |
| Villagers wander weirdly | Pathing is messy | Simplify room layout |
| Breeder works once, then stops | No extra bed / babies clogging system | Increase bed logic and move babies out |
| Random inconsistency | Nearby village beds interfere | Remove or isolate nearby beds |
1. Not enough beds
This is extremely common. You need more beds than breeding adults, so the new baby has a valid bed opportunity.
2. Villagers cannot really access beds
The beds may exist, but if the setup blocks recognition or access, breeding can fail.
3. Not enough food
Throw a real amount of food, not just one or two items.
4. Nearby beds are confusing the system
This is especially common if your breeder is too close to:
- your main base bed cluster
- another villager cell
- a natural village with leftover beds
5. Babies are not being separated
If the breeder gets congested, efficiency drops hard.
Warning: “It worked once” is not proof the design is good. A real breeder should work consistently, not just accidentally.

How Far Should the Breeder Be From the Trading Hall?
There is no single perfect distance for every world, but the key is control.
You want it:
- close enough for easy transport
- far enough that random beds and villager job cells do not interfere
For many survival builds, a short rail line or elevated path nearby is ideal.
Practical distance philosophy
- too close = village/bedding confusion risk
- too far = villager transport becomes annoying
A short dedicated breeder district is often best.
Safety Tips: Protecting Your Villager Breeder 🧱🛡️
Villagers are valuable. Treat them like expensive infrastructure.
Protect your breeder from:
- zombies
- baby zombies
- poor lighting
- open cliff edges
- accidental player damage
- water leaks
- lava near transport lines
Breeder safety checklist
- fully lit
- enclosed walls
- roof if needed
- no mob spawn spots nearby
- easy player access for maintenance
- no easy villager escape route
Tip: A breeder that looks simple but is safe is much better than a fancy breeder that leaks villagers or gets them killed.
Best Time to Build a Villager Breeder in Survival
A good time is usually:
- after you secure your first village or first pair of villagers
- after basic food and iron are stable
- before building a large trading hall
- before you start hunting for perfect librarian trades
In progression terms, a villager breeder often becomes worthwhile right before or during your trading hall phase.
If you already know you want:
- Mending
- strong enchanted books
- easy emerald income
- diamond gear trades
then building it earlier is usually smart.
What to Do After the Breeder Is Working
Once your breeder is producing babies consistently, your next priorities should be:
- build or improve your trading hall
- set up a grow-out / holding area
- prepare job blocks
- begin sorting for key professions
Best early professions to target
- Librarian
- Farmer
- Toolsmith
- Armorer
- Weaponsmith
- Cleric
That is where the breeder starts turning into real survival power.

Best Pairing: Villager Breeder + Trading Hall + Curing Plan 🔥
If you want an advanced long-term setup, the strongest progression path is:
Breeder → Trading Hall → Zombie Curing Discounts
Why?
Because once you can mass-produce villagers, you can:
- hunt for the exact trades you want
- cure villagers later for massive value
- rebuild bad hall sections quickly
- scale up emerald farming much faster
This is how a simple breeder becomes part of a full villager economy.
Beginner-Friendly Example Build Plan
Here is a very practical survival plan:
Phase 1: Start
- capture 2 villagers
- place 3+ beds
- build compact breeder room
- feed villagers manually
Phase 2: Stabilize
- add baby drop or water stream
- create holding pen
- secure breeder from mobs
Phase 3: Expand
- increase beds if needed
- connect to rail line
- move adults to job assignment cells
Phase 4: Optimize
- add crop support
- improve transport speed
- sort villagers into your trading hall efficiently

Common Beginner Mistakes to Avoid ❌
1. Building too close to random village beds
This creates confusion fast.
2. Forgetting the baby exit path
A breeder without extraction is only half-finished.
3. Using too little food
Villagers are not going to run a population boom on scraps.
4. Making the room too messy
Clean pathing beats “creative-looking” clutter.
5. Not planning transport to the trading hall
You do not want 12 grown villagers standing uselessly in one box.
6. Ignoring lighting and zombie safety
One disaster can ruin hours of setup.
7. Assuming workstations are the main breeding trigger
Beds and food are the real core mechanics here.
Quick FAQ
How many beds do you need for 2 villagers to breed?
At minimum, you generally want 3 beds so there is an extra valid bed for the baby.
What food do villagers need to breed?
Common breeding foods are bread, carrots, potatoes, and beetroots. Current guides consistently list 3 bread or 12 carrots/potatoes/beetroots as the standard food requirement pattern.
Do villagers need workstations to breed?
Not primarily. Workstations matter for professions and trading hall logic, but the key breeding requirements are food, beds, and willingness.
How long does it take for a baby villager to grow up?
About 20 minutes under normal conditions.
Why do villagers show hearts but no baby appears?
That usually points to a bed/access issue or an invalid breeding setup rather than a food problem.
Is a villager breeder worth it for a small survival world?
Yes—especially if you want enchanted books, emeralds, cheap gear, or a compact trading hall.

A Villager Breeder Is One of the Best Long-Term Systems in Minecraft 🏆
A lot of Minecraft builds look cool. A villager breeder does something better:
It saves you time for the rest of your world.
Once it works, you stop worrying about where your next villager will come from. You can expand your trading hall, reroll bad professions, build stronger farms, and create a much more powerful survival setup without depending on luck.
That is why this build matters so much.
If you want the simplest version of the strategy, remember this:
- 2 villagers
- extra beds
- enough food
- safe breeder room
- automatic baby exit
- clean link to your trading hall
That is the foundation of an infinite villager system.
Pro Tip: The best villager breeder is not the fanciest one. It is the one that is easy to maintain, easy to troubleshoot, and easy to connect to your trading hall.