
By Day 4 in Minecraft, your survival world should finally be moving out of the “fragile beginner” stage. You are no longer just trying to survive one more night. Now, the goal is to become consistent, protected, and efficient.
This is the day where your early game can either become smooth and powerful or stay slow and messy.
Many players waste Day 4 without realizing it. They keep using partial gear, they forget key utility items, they smelt resources in a chaotic way, or they spend too much time mining without turning those materials into real advantages. The result is predictable: they still feel underpowered, caves still feel dangerous, and basic survival still takes more effort than it should.
A smart Day 4 changes that.
This is the day to focus on:
- getting much closer to full iron armor
- crafting or fully committing to a shield
- making a bucket part of your normal loadout
- improving your furnace setup
- turning iron from “nice resource” into “daily survival power”
If you do this correctly, the game becomes noticeably easier. Mobs hurt less. Mining gets safer. Smelting becomes faster. Exploration becomes less stressful. And most importantly, you stop feeling like one mistake will end your progress.
This guide is designed for beginners, but it is written with higher-quality strategy in mind. By the end, you will understand how to reach a strong early-game iron setup and why a proper furnace layout matters more than most new players think.

What Day 4 Is Really About
Day 4 is not about fancy builds or risky adventures. It is about consolidation.
You already survived.
You already mined.
You already gathered early resources.
Now you need to convert those raw materials into a setup that makes the rest of your survival world easier.
That means:
- fewer unnecessary deaths
- more efficient smelting
- stronger gear choices
- better use of every iron ingot
- a base that supports future upgrades
In simple terms, Day 4 is where you stop being “under-equipped.”
Your Main Day 4 Goals
A strong Day 4 usually revolves around four practical targets:
| Priority | Goal | Why It Matters |
|---|---|---|
| 1 | Reach full iron armor or get very close | Massive survivability boost |
| 2 | Keep a shield in your standard loadout | Excellent defense against skeletons and surprises |
| 3 | Craft and use a bucket regularly | Adds mobility, safety, and utility |
| 4 | Build a clean furnace setup | Saves time and improves all future progression |
If you complete all four, your survival world becomes much more stable.
Tip: Day 4 is one of the best “power spike” days in early Minecraft. A few smart iron decisions here can make Days 5–8 dramatically easier.

Why Full Iron Armor Matters So Much
There is a huge difference between wearing random partial gear and wearing a proper iron set.
With weak gear, every cave feels dangerous.
With solid iron armor, you gain room for mistakes.
That matters a lot for beginners because Minecraft punishes small errors:
- falling from medium height
- skeleton shots from dark corners
- unexpected creeper damage
- getting swarmed in caves
- panic fights when hunger is low
Iron armor does not make you immortal, but it gives you enough protection to recover from bad moments that would otherwise kill you.
Full iron armor pieces
A full iron armor set includes:
- Iron Helmet
- Iron Chestplate
- Iron Leggings
- Iron Boots
Total iron needed
You need 24 iron ingots for a full set.
Here is the full cost:
| Armor Piece | Iron Needed |
|---|---|
| Helmet | 5 |
| Chestplate | 8 |
| Leggings | 7 |
| Boots | 4 |
| Total | 24 |
For a new player, that can sound expensive. But by Day 4, this is a realistic goal if you mined properly on Days 2 and 3.

Which Iron Armor Piece Should You Craft First?
If you do not yet have enough iron for the full set, prioritize your armor in the smartest order.
Best iron armor crafting order
- Chestplate
- Leggings
- Helmet
- Boots
Why this order? Because the chestplate and leggings usually give the biggest protection value first.
Here is a simple priority breakdown:
| Craft Order | Piece | Reason |
|---|---|---|
| 1 | Chestplate | Biggest defensive value |
| 2 | Leggings | Strong second upgrade |
| 3 | Helmet | Good, but less impactful than chestplate |
| 4 | Boots | Useful, but usually last priority |
Pro Tip: If you are short on iron, do not spread your resources randomly. A chestplate plus shield is often far stronger than several low-priority upgrades with no real plan.
Should You Make Full Iron Armor Before Other Items?
Not always.
This is one of the most common beginner mistakes. Players see iron, get excited, and spend everything on armor immediately. Then they realize they still need:
- an iron pickaxe
- a shield
- a bucket
- spare ingots for important tools
That is why Day 4 is about balanced iron spending, not blind crafting.
A smart player does not just ask:
“Can I make full iron?”
They ask:
“What iron setup makes me strongest overall?”
In many cases, the best setup is:
- iron pickaxe
- shield
- bucket
- best armor pieces possible
- reserve iron for future needs

The Shield: Your Most Underrated Survival Item
If armor protects your body, the shield protects your mistakes.
And in the early game, mistakes happen constantly.
A shield is one of the best-value items in Minecraft. It is cheap, easy to use, and incredibly powerful in situations that kill beginners all the time.
Shield recipe cost
- 1 iron ingot
- 6 wooden planks
That is an amazing return for what it does.
Why the shield is so important
A shield helps with:
- skeleton arrows
- zombie pressure in tight tunnels
- surprise cave fights
- creeper damage reduction if timed properly
- general panic defense while retreating
The most important thing about the shield is not just blocking damage. It gives you time.
Time to react.
Time to back up.
Time to eat.
Time to reposition.
Time to survive.
Tip: If skeletons are your biggest early-game problem, a shield will help more than almost any other cheap upgrade.
Common shield mistake
Many beginners craft a shield, then forget to actually use it. A shield only helps when it is active and in your normal habit loop.
Train yourself to raise it:
- before entering dark cave corners
- when hearing skeletons
- when opening uncertain paths
- while backing up from mobs
That habit alone can save your world.

The Bucket: Small Item, Massive Impact
A bucket does not look flashy. It is not armor. It is not a weapon. It is not rare.
But it is one of the most important utility items in Minecraft.
Why a bucket is game-changing
A water bucket can help you:
- survive falls
- descend safely into caves
- put out fire
- cross awkward terrain
- start a farm
- control lava areas more safely
- create temporary movement paths
For beginners, the bucket brings something incredibly valuable: control.
Instead of reacting helplessly to terrain, you begin shaping it.
Bucket cost
- 3 iron ingots
That is a small price for how useful it becomes.
Here is a quick look:
| Item | Iron Cost | Value |
|---|---|---|
| Shield | 1 | Very high defense value |
| Bucket | 3 | Huge utility and safety |
| Iron Pickaxe | 3 | Essential for progression |
| Chestplate | 8 | Strong armor value |
Pro Tip: If you are debating between a low-impact armor piece and a bucket, the bucket often gives more practical value to a beginner.
Water Bucket vs Empty Bucket: What Should You Carry?
As soon as possible, your bucket should usually become a water bucket.
Why?
Because water gives immediate survival benefits:
- safer drops
- mobility in caves
- emergency fire protection
- terrain control
An empty bucket still has uses, but in normal early-game survival, a water bucket is much more practical as a standard carry item.
Beginner water bucket advice
If you are not yet confident using water for tricky movement, that is okay. Even simple uses are powerful:
- place water to go down a steep area
- use it to escape fire
- soften dangerous terrain
- create safer cave entry routes
You do not need advanced skills for it to be useful.

How Much Iron Do You Really Need on Day 4?
If you want a very strong Day 4 setup, this is a useful target:
| Item Group | Iron Needed |
|---|---|
| Full armor | 24 |
| Iron pickaxe | 3 |
| Shield | 1 |
| Bucket | 3 |
| Total ideal loadout | 31 |
That is a solid benchmark.
Now, you may not have 31 ingots immediately, and that is fine. You do not need perfection on Day 4. You just need to move clearly toward this setup.
A realistic Day 4 result might be:
- iron pickaxe
- shield
- bucket
- chestplate
- leggings
- some spare iron left
That is already excellent progress.
The Best Iron Upgrade Path for Day 4
If your iron supply is limited, use this order:
- Iron Pickaxe
- Shield
- Bucket
- Chestplate
- Leggings
- Helmet
- Boots
- Iron Sword if still needed
- Spare pickaxe or reserve ingots
This order gives the best mix of:
- survival
- utility
- future progression
- practical efficiency
Warning: Full armor with no bucket and no shield can look strong, but it often performs worse in real survival situations than a more balanced loadout.
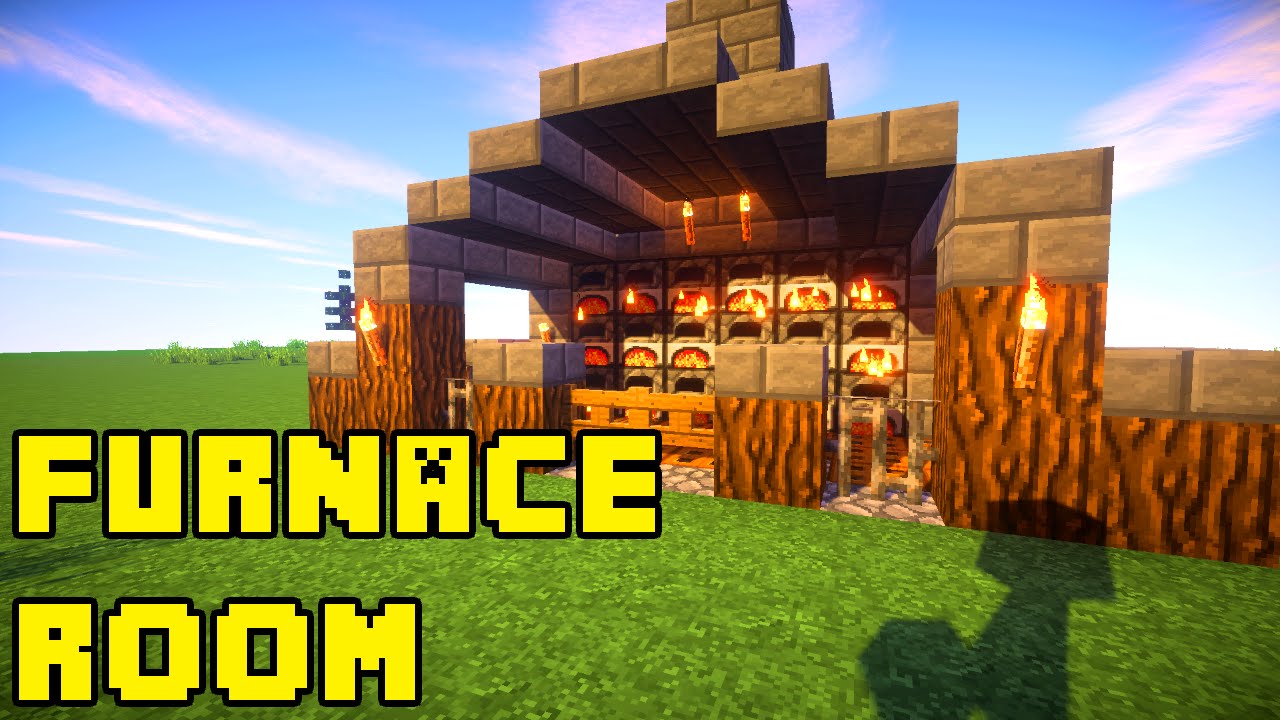
Furnace Setup: Why It Matters More Than New Players Think
Beginners often treat furnaces as random utility blocks they place wherever there is space. That works at first, but by Day 4, poor furnace management starts wasting a lot of time.
A clean furnace setup helps you:
- smelt ore faster
- cook food more consistently
- organize your base better
- reduce idle waiting
- prepare for mining trips more efficiently
A furnace is not just a crafting block. It is a resource conversion machine.
And on Day 4, that matters a lot.
The Ideal Beginner Furnace Setup
For Day 4, you do not need a huge industrial smelting room. But you should aim for more than one random furnace in a corner.
Recommended beginner setup
A great Day 4 furnace area includes:
- 2 furnaces minimum
- easy access from storage
- nearby chest space
- fuel placed in a clear spot
- one furnace mainly for food
- one furnace mainly for ores
This creates a simple but effective workflow.
Here is a good basic structure:
| Furnace | Main Use |
|---|---|
| Furnace 1 | Smelting iron and other ores |
| Furnace 2 | Cooking food |
| Optional Furnace 3 | Backup smelting / charcoal / extra jobs |
Why two furnaces help so much
Two furnaces mean:
- less waiting
- more efficient use of time
- easier organization
- smoother prep before dangerous trips
For example, while one furnace cooks food, the other can process iron. That saves time every single day.
Tip: Day 4 is the perfect moment to stop thinking “one furnace is enough” and start thinking in terms of workflow.

Best Place to Put Furnaces in Your Base
Your furnace area should be close to:
- storage chests
- crafting table
- mine entrance if possible
This keeps your survival loop efficient:
- return from mining
- dump items in chest
- smelt ore
- cook food
- re-equip quickly
- head back out
If your base layout forces you to walk around awkwardly or keep checking random corners, your setup is slowing you down.
Good furnace placement ideas
- against one wall near storage
- next to crafting table
- in a dedicated “work corner”
- near the base entrance if your mine is nearby
You do not need luxury. You need flow.
Coal, Charcoal, and Fuel Efficiency
By Day 4, you should start thinking about fuel a little more intelligently.
Best early fuels
| Fuel | Good Early Game? | Notes |
|---|---|---|
| Coal | Yes | Best common early fuel |
| Charcoal | Yes | Great backup when coal is low |
| Wooden Planks | Only if necessary | Useful in emergencies but less efficient long-term |
| Logs | Not ideal | Better used for crafting or converted into charcoal |
Coal is still the best general fuel for most early situations, but charcoal is excellent if your world has plenty of wood and less easy coal nearby.
Smart fuel rule
Use your fuel intentionally.
Do not burn valuable building wood carelessly if you have better options.
Pro Tip: If you ever feel “always low on fuel,” the problem is usually not bad luck. It is usually because your furnace setup and resource planning are too messy.

When Should You Mine More Iron on Day 4?
If you are close to full iron but not there yet, Day 4 is an excellent time for a short targeted iron run.
The key word is targeted.
Do not turn it into a giant risky cave adventure unless you are ready. Instead:
- use your existing staircase mine
- revisit safe cave sections
- collect visible iron you skipped
- come home once you reach your upgrade target
Smart Day 4 iron goal examples
- enough for chestplate if you do not have one
- enough for bucket + shield if missing
- enough to complete full iron armor
- enough to keep 3–6 spare ingots in reserve
That reserve matters more than beginners expect. It helps when tools break, new needs appear, or you suddenly need another bucket or pickaxe.
How Full Iron Changes the Way You Play
The moment you reach near-full or full iron, your playstyle can become much more confident.
You can:
- enter caves with less fear
- recover from mistakes more easily
- take controlled fights more safely
- explore farther without feeling fragile
- handle nights with less stress
This does not mean you should become reckless.
Iron gear gives you security, not invincibility.
That distinction is important because many beginners get full iron and immediately start overestimating themselves. Then a creeper, ravine, or mob swarm reminds them that armor helps—but bad decisions still hurt.
Warning: Full iron is a strong milestone, but it is not permission to stop playing carefully.

Suggested Day 4 Base Upgrade Checklist
If you want a clean practical list, aim to finish most of these by the end of Day 4:
- Iron pickaxe crafted
- Shield crafted and actively used
- Bucket crafted, ideally filled with water
- Full iron armor or close to it
- At least 2 furnaces placed
- Food and ore smelting separated
- Coal/charcoal reserve stored
- Iron reserve stored
- Base layout improved for faster workflow
- Inventory organization slightly improved
If you complete even 70–80% of that list, you are in a very strong early-game position.
Common Day 4 Mistakes Beginners Make
Avoid these, and your progress will feel much smoother.
1. Spending all iron on armor immediately
That leaves no room for shield, bucket, or tool progression.
2. Ignoring the bucket
Many players delay it too long, then realize how useful it is only after several avoidable problems.
3. Crafting a shield but not using it
A forgotten shield gives zero value.
4. Keeping only one furnace forever
This creates unnecessary waiting and slows everything.
5. Smelting randomly
Cooking food, ore, and backup charcoal without a clear plan creates clutter.
6. Wearing partial gear but carrying spare iron uselessly
If the iron should be converted into survival power now, use it.
7. Overconfidence after getting stronger
Better gear helps, but caution is still part of survival.
A Smart Day 4 Schedule for Beginners
Here is a practical structure you can follow.
Morning: assess your iron situation
- count total iron ingots
- check which gear pieces you already have
- identify your next most valuable upgrade
Mid-morning: targeted mining if needed
- collect missing iron
- gather extra coal
- avoid unnecessary deep risk
Midday: smelt and craft
- smelt all raw iron
- craft shield and bucket if missing
- improve armor in smart order
Afternoon: upgrade furnace area
- place second furnace
- reorganize work corner
- separate food and ore workflow
Late afternoon: test your improved loadout
- short trip outside
- light exploration
- gather food or wood
- use shield and bucket actively
Evening: reset and prepare for Day 5
- organize storage
- stock torches
- cook extra food
- sleep with a stronger setup than ever before
This makes Day 4 feel productive without becoming chaotic.

What a Successful Day 4 Looks Like
By the end of Day 4, a strong beginner setup usually includes:
| Area | Good Result |
|---|---|
| Gear | Full iron or close to it |
| Defense | Shield in normal use |
| Utility | Water bucket ready |
| Smelting | 2+ furnaces with better workflow |
| Resources | Stable iron and coal supply |
| Base | More organized and efficient |
| Confidence | Less fear, more control |
That is exactly what you want.
Day 4 is not supposed to be flashy. It is supposed to make the rest of the game easier.
And when done well, it absolutely does.
Beginner FAQ
How much iron do I need for full armor in Minecraft?
You need 24 iron ingots for a full iron armor set.
What should I craft first with iron on Day 4?
Usually an iron pickaxe, shield, and bucket are among the smartest early priorities before finishing every armor piece.
Is a shield really necessary if I already have armor?
Yes. A shield provides amazing extra defense, especially against skeletons and dangerous surprise encounters.
Why is the bucket so important?
A bucket, especially a water bucket, gives mobility, safety, farming potential, and fire protection. It is one of the best utility items in the game.
How many furnaces should I have by Day 4?
At least 2 furnaces is a great beginner target. One for ore, one for food is a very practical setup.
Should I wait for full iron before exploring more?
Not necessarily, but getting closer to full iron before major cave risk is usually the safer beginner strategy.
Day 4 Is Where Efficiency Starts Winning
The first few days in Minecraft are often about survival, confusion, and basic progress. But Day 4 is where things begin to feel cleaner.
This is the day where you stop carrying raw potential and start turning it into real power.
A better armor setup makes combat safer.
A shield protects you from bad moments.
A bucket gives you options.
A smarter furnace layout saves time every single day.
None of these upgrades are flashy on their own.
Together, they transform your world.
If you play Day 4 well, you are no longer just “getting by.”
You are building a survival setup that can actually grow.