There’s a moment in every Minecraft world where you realize something uncomfortable:
You can be wearing diamond armor… holding a diamond pickaxe… carrying stacks of loot… and still feel like you’re sprinting on a treadmill.
Why?
- Your tools still break.
- Your best enchants are “maybe someday.”
- Your progress depends on luck: caves, veins, random drops.
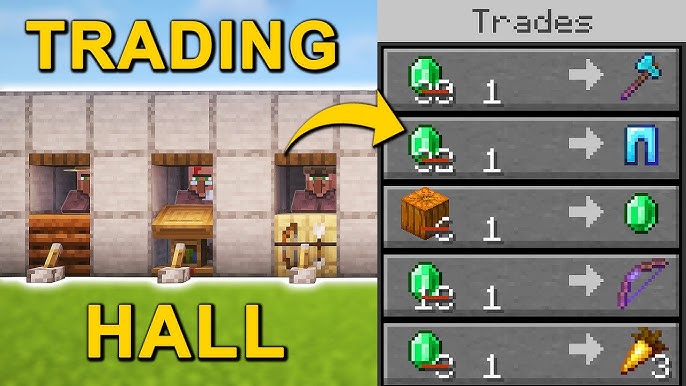
And then you meet your first truly “good” villager trade.
It might be a Librarian offering Unbreaking. Or Efficiency. Or—if the Minecraft gods are smiling—Mending.
You click once. You hear the trade sound. And you suddenly understand the late-game secret:
Power isn’t mined anymore. It’s purchased. 😎
Day 11 is about building the system that makes that statement true. Today you’re not digging for diamonds. You’re building a Trading Hall—a controlled villager market that turns crops, sticks, and paper into emeralds… and turns emeralds into enchants, gear, and long-term dominance.

Day 11 Objectives
- Build a simple, expandable Trading Hall (villager pods)
- Transport at least 2–6 villagers into controlled stalls
- Set up a reliable emerald engine (farmer/paper/sticks)
- Learn the trade reset method and lock one “good” book
- Create a safe, repeatable workflow so trading becomes routine
1) Why Trading Hall Is the Real “Easy Mode” Switch
When you have a working Trading Hall, Minecraft changes in three big ways:
- Consistency: No more “hope I find the enchant I need.” You can lock it.
- Efficiency: Emeralds become a repeatable currency, not a rare gift.
- Security: Better gear → fewer deaths → faster progress.
It’s not that mining becomes useless—mining becomes optional. That’s the difference between surviving and dominating.
2) The Two Villager Rules That Control Everything 🔒
If you remember only two rules, remember these:
Rule #1: A villager’s profession is chosen by its workstation (Lectern, Composter, etc.).
Rule #2: The moment you trade with a villager once, its trades are locked permanently.
That’s the entire “villager meta.”
So the strategy becomes simple:
- Assign a workstation → check the trades
- If you like them → trade once → lock forever
- If you don’t like them → break the workstation → reroll

3) Where to Build the Trading Hall (Placement Matters)
Best early placement is:
- Near your base (you’ll use it constantly)
- But not inside your main living room (noise + chaos)
- In a controlled, well-lit area (villagers + zombies is a disaster)
Practical tip: Build it close enough to be convenient, far enough that if something goes wrong (like a raid or a mob slip), your main base doesn’t become a war zone.
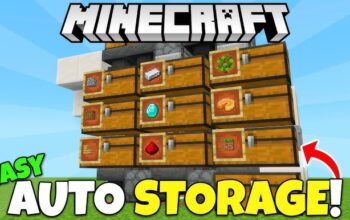
4) The “Beginner Perfect” Trading Hall Design: Villager Pods 🧱
You don’t need a mega structure. You need control.
The cleanest early design is a row of simple stalls (“pods”). Each villager gets its own tiny space, so workstations don’t get mixed up and you don’t lose your mind.
Recommended pod size ✅
- 1 block wide
- 2 blocks long
- 2 blocks tall
How it works:
- You stand in front and trade safely
- The villager can’t wander
- The workstation is placed in a controlled spot (usually behind or beside the villager)
Trading Hall is not a village. It’s a vending machine wall.
5) Villager Transport: The 3 Practical Methods
Villagers are not difficult. They’re just annoying. Pick the method that fits your world.
Method A: Boat (Fastest early-game) 🚣
- Cheap and simple
- Great on flat land or rivers
- Annoying uphill (but still doable)
Method B: Minecart + Rails (Best for long-term) 🚋
- Costs iron (but you’ll want this later anyway)
- Extremely reliable for long distances
Method C: Build at the Village (If it’s close) 🏡
- No transport needed
- But protecting the village becomes your responsibility
Day 11 recommendation: Boat is enough to start. Upgrade to rails later when iron becomes easier.

6) The First 5 Villagers You Actually Want (Starter Roster)
Don’t try to build “every villager” today. Build a core squad that gives you power and money.
- Farmer (Composter) — emerald engine from crops 🌾
- Fletcher (Fletching Table) — emergency emeralds from sticks 🪵
- Librarian #1 (Lectern) — book hunting 📚
- Librarian #2 (Lectern) — faster book hunting 📚
- Armorer (Blast Furnace) — armor upgrades 🛡️
If you want a sixth:
- Toolsmith (Smithing Table) — tools and upgrades ⛏️
Day 11 win condition: one reliable emerald income + one locked “big” enchant book.
7) Emerald Engines: How to “Print Money”
You can’t buy power without currency. So before you hunt books all day, set up an emerald loop.
Engine #1 (Best overall): Farmer trades 🌾
If you built a crop farm on Day 5, congratulations—you already built an economy.
- Harvest crops in bulk
- Sell to farmers
- Repeat daily
Engine #2 (Fast emergency): Fletcher stick trades 🪵
Wood is everywhere. Sticks are cheap. This is the “I need emeralds right now” button.
Engine #3 (Clean and scalable): Paper trades 📄
If your sugar cane line is running, paper becomes a steady income stream. It also supports bookshelves.
Best combo: Farmer (steady) + Fletcher (burst) + Paper (scalable).

8) The Lectern Reset Method (How to “Reroll” Enchanted Books)
This is the technique that turns villagers into an enchant factory.
Step-by-step ✅
- Place a villager into a pod
- Place a Lectern nearby
- The villager becomes a Librarian
- Check the first enchanted book trade
- If you don’t like it: break the lectern
- Place the lectern again → trade rerolls
- Repeat until you see a book you want
- Trade once to lock the villager forever 🔒
That’s it. No hacks. No mods. Just controlled rerolling.
Important: Do NOT trade with the villager until you’re ready to lock the book you want. One accidental trade = permanent regret.
9) The “Big Book” Priority List (What to Lock First)
Don’t get distracted by random books. Aim for the ones that change your world.
- Mending — the “tools don’t die” enchant
- Unbreaking III — durability multiplier
- Efficiency IV/V — speed = progress
- Protection IV — survival spike
- Sharpness IV/V — clean damage
Realistic Day 11 goal: lock one major book. If you land Mending, your series just entered the next tier.
10) Locking Trades Without Losing Your Mind (Practical Workflow)
Here’s the cleanest Day 11 workflow:
- Set up your emerald engine first (Farmer + Fletcher)
- Build 2 Librarian pods side-by-side
- Reroll both librarians until one hits a major book
- Trade once immediately to lock
- Label the villager pod (signs help a lot)
You don’t need 20 villagers today. You need one locked win.

11) Common Trading Hall Disasters (And How to Avoid Them) 🧯
- Disaster: Workstations mix and villagers steal each other’s jobs
Fix: Use pods and keep unused workstations far away. - Disaster: You accidentally trade the wrong librarian and lock junk
Fix: Always check the book first, then trade once only when ready. - Disaster: Zombies kill or convert villagers at night
Fix: Light everything and fully enclose the hall. - Disaster: A raid starts near your villagers (chaos)
Fix: Don’t bring Bad Omen near your hall. Ever.
12) The Day 11 “Power Purchase” Plan (What You Should Buy First)
Once you lock a major book and have emeralds flowing, spend smart:
- Buy your first core books (Unbreaking / Efficiency / Protection)
- Start enhancing your main pickaxe and armor
- Buy gear upgrades from Armorer/Toolsmith if available
This is how you stop mining diamonds “for survival” and start mining them “for projects.”

Day 11 Checklist ✅
- [ ] Trading Hall pods built (at least 4–6)
- [ ] Villagers transported and contained safely
- [ ] Emerald engine online (Farmer or Fletcher minimum)
- [ ] At least one Librarian rerolled successfully
- [ ] One valuable trade locked (trade made once)
- [ ] Hall is secured, lit, and protected
Day 11 Is When You Stop Gambling 🧑🌾
Mining is luck. Trading is control.
Once your Trading Hall exists, your world gains a new axis: economy. And economy is what turns Minecraft from survival into strategy.